
Creating and Using Job Templates for Pull Lists
Use job templates to save standardized material lists (pull lists) that your crews use repeatedly. Set them up once, then quickly apply them to any job to save time and ensure consistency.
Step by step
- 1
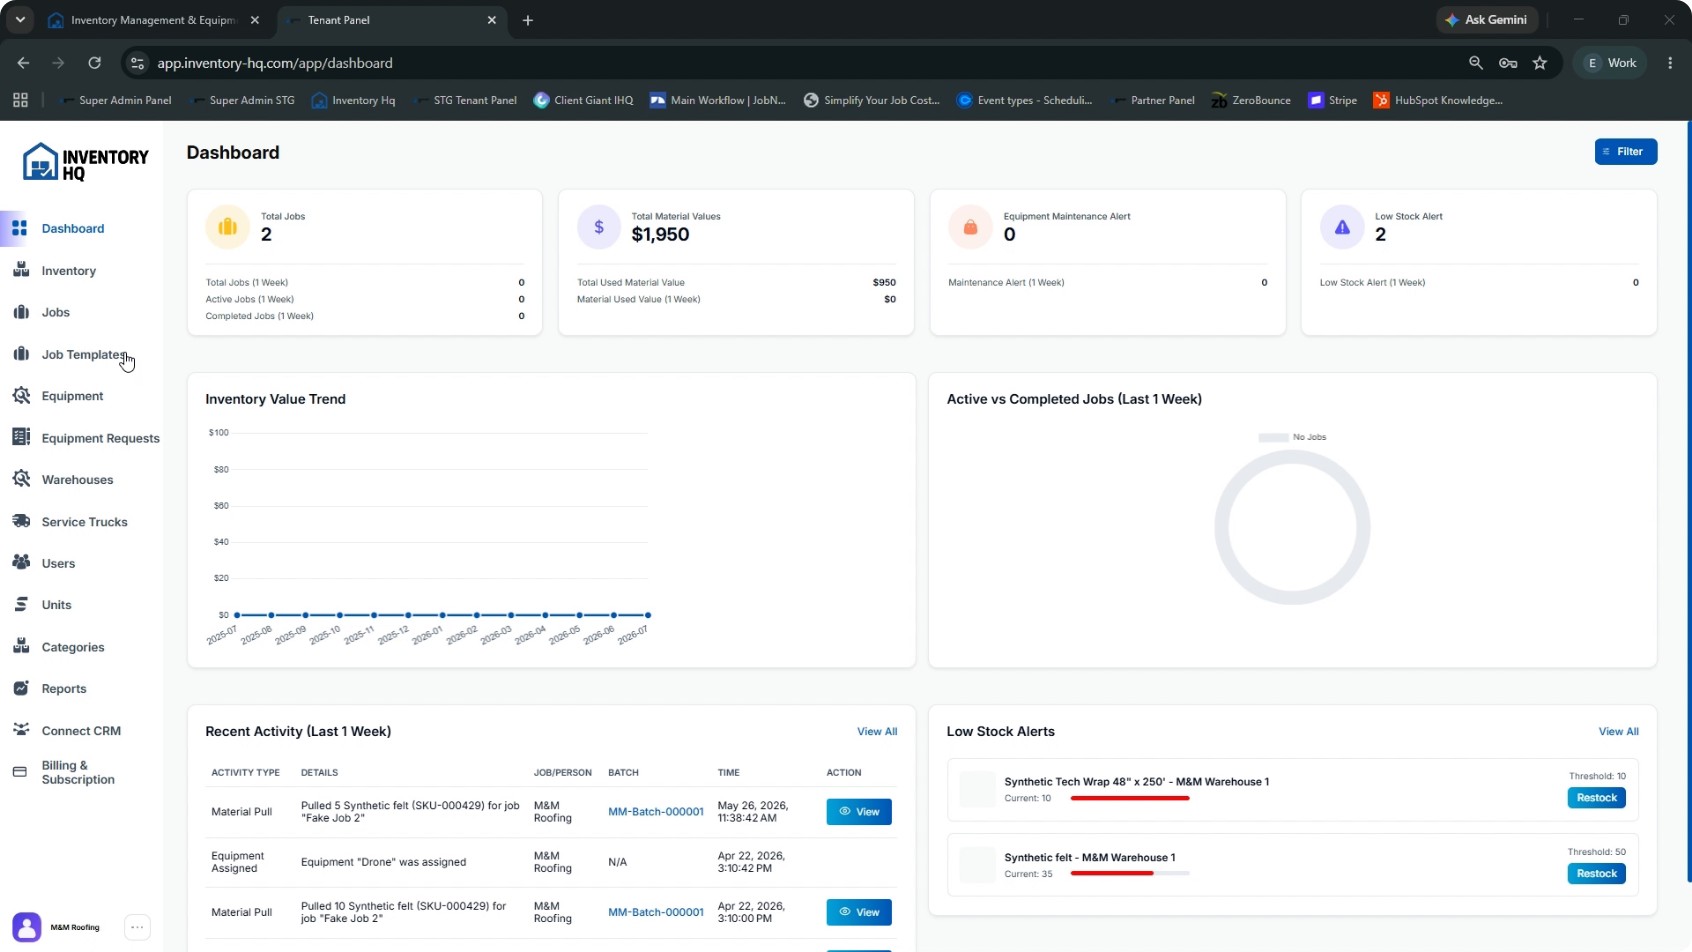
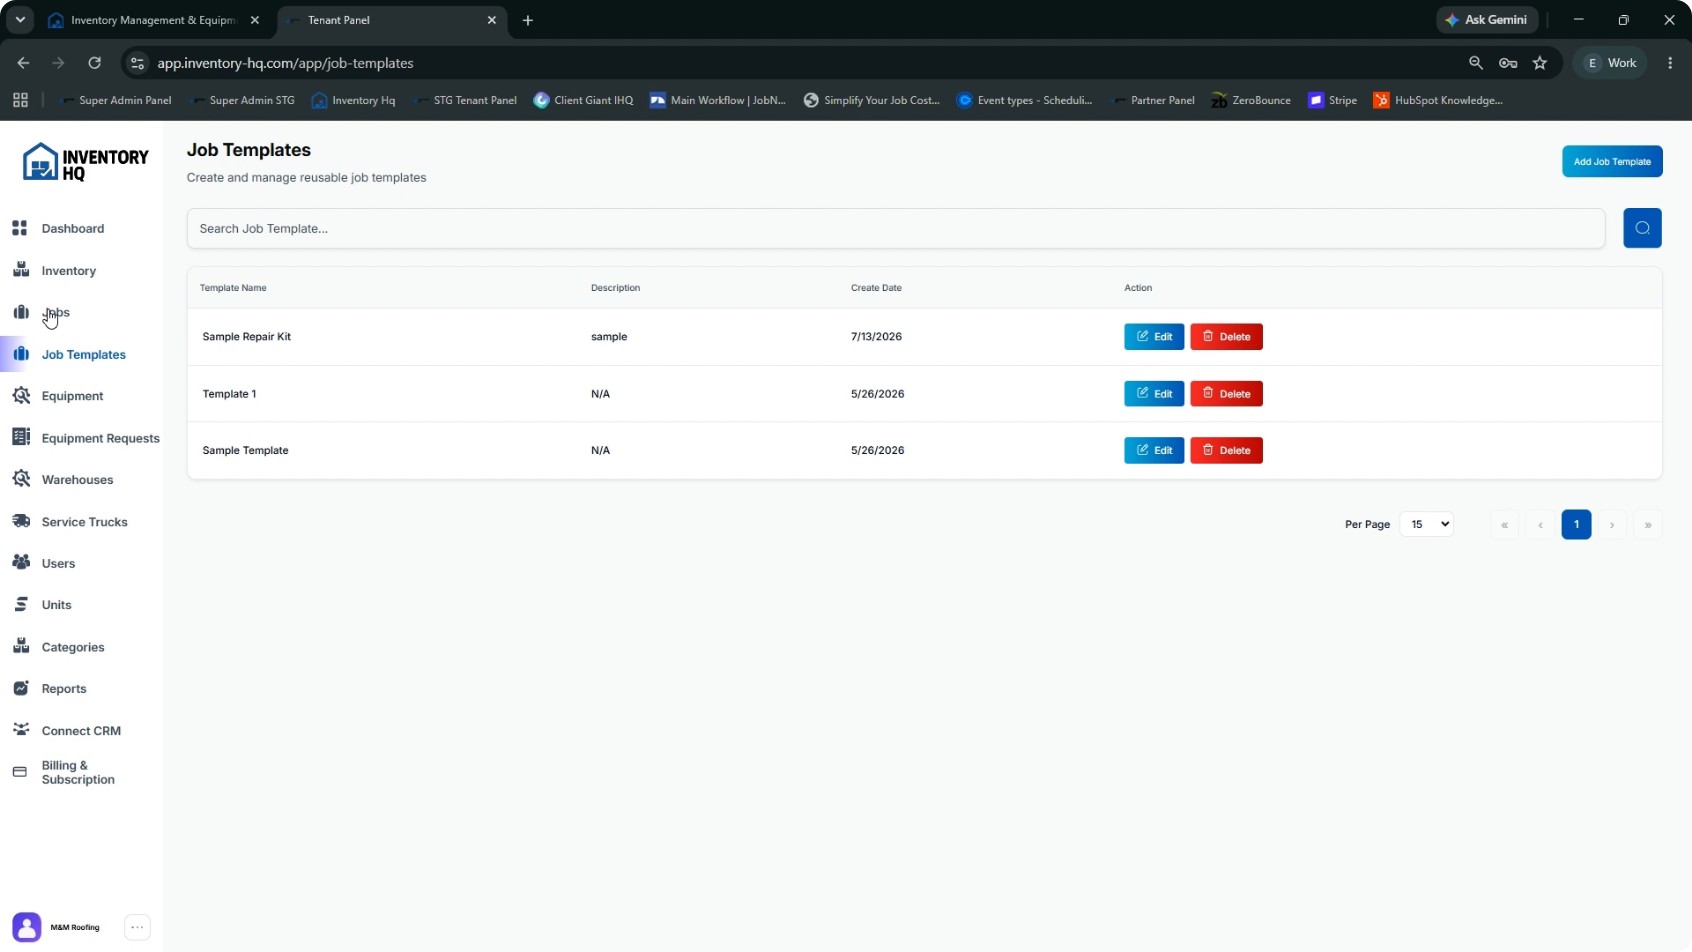
Open the Job Templates Page
Click Job Templates from the side panel.
- 2
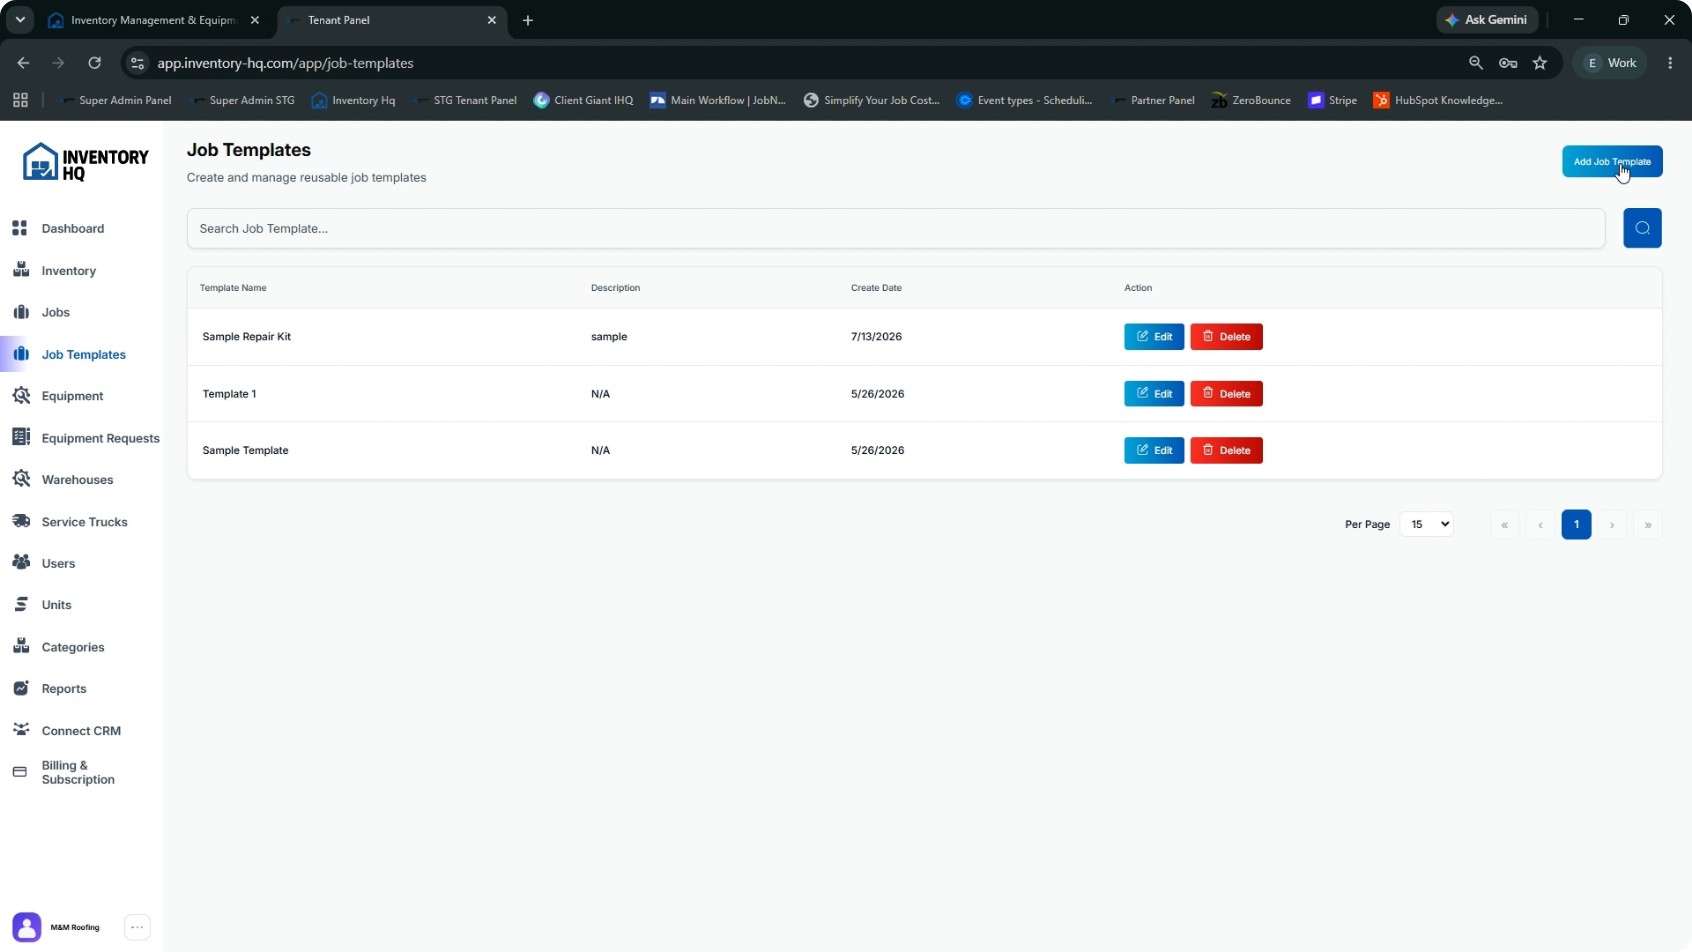
Start a New Job Template
Click Add Job Template at the top right corner to create a new template.
- 3
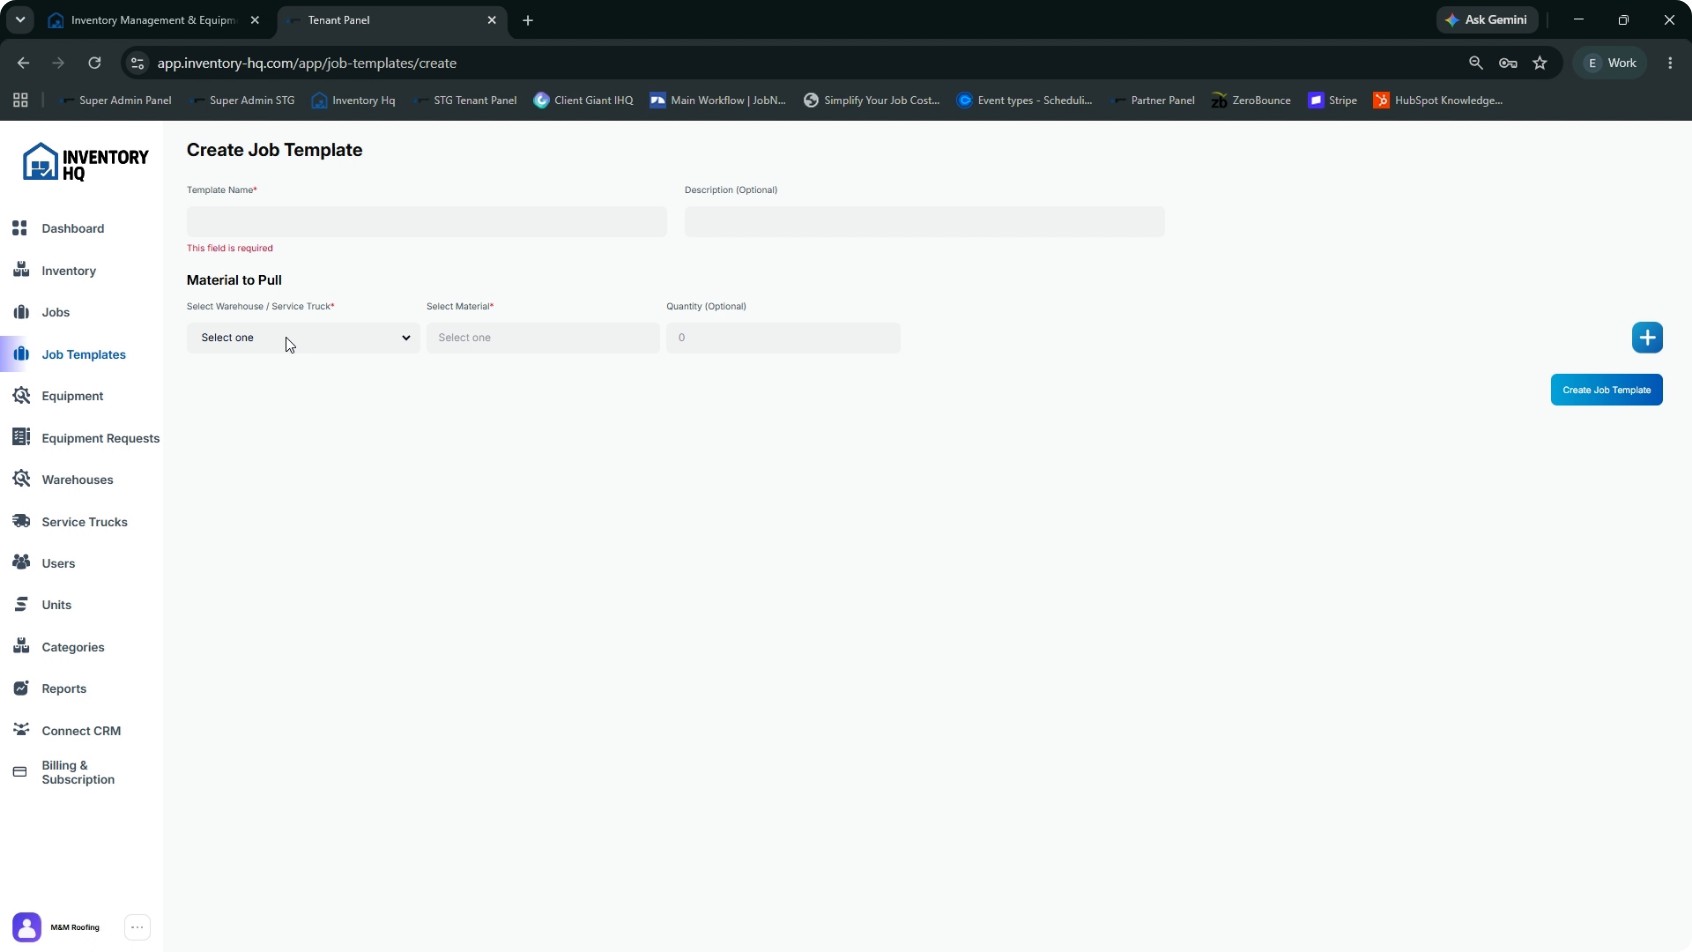
Name and Describe the Template
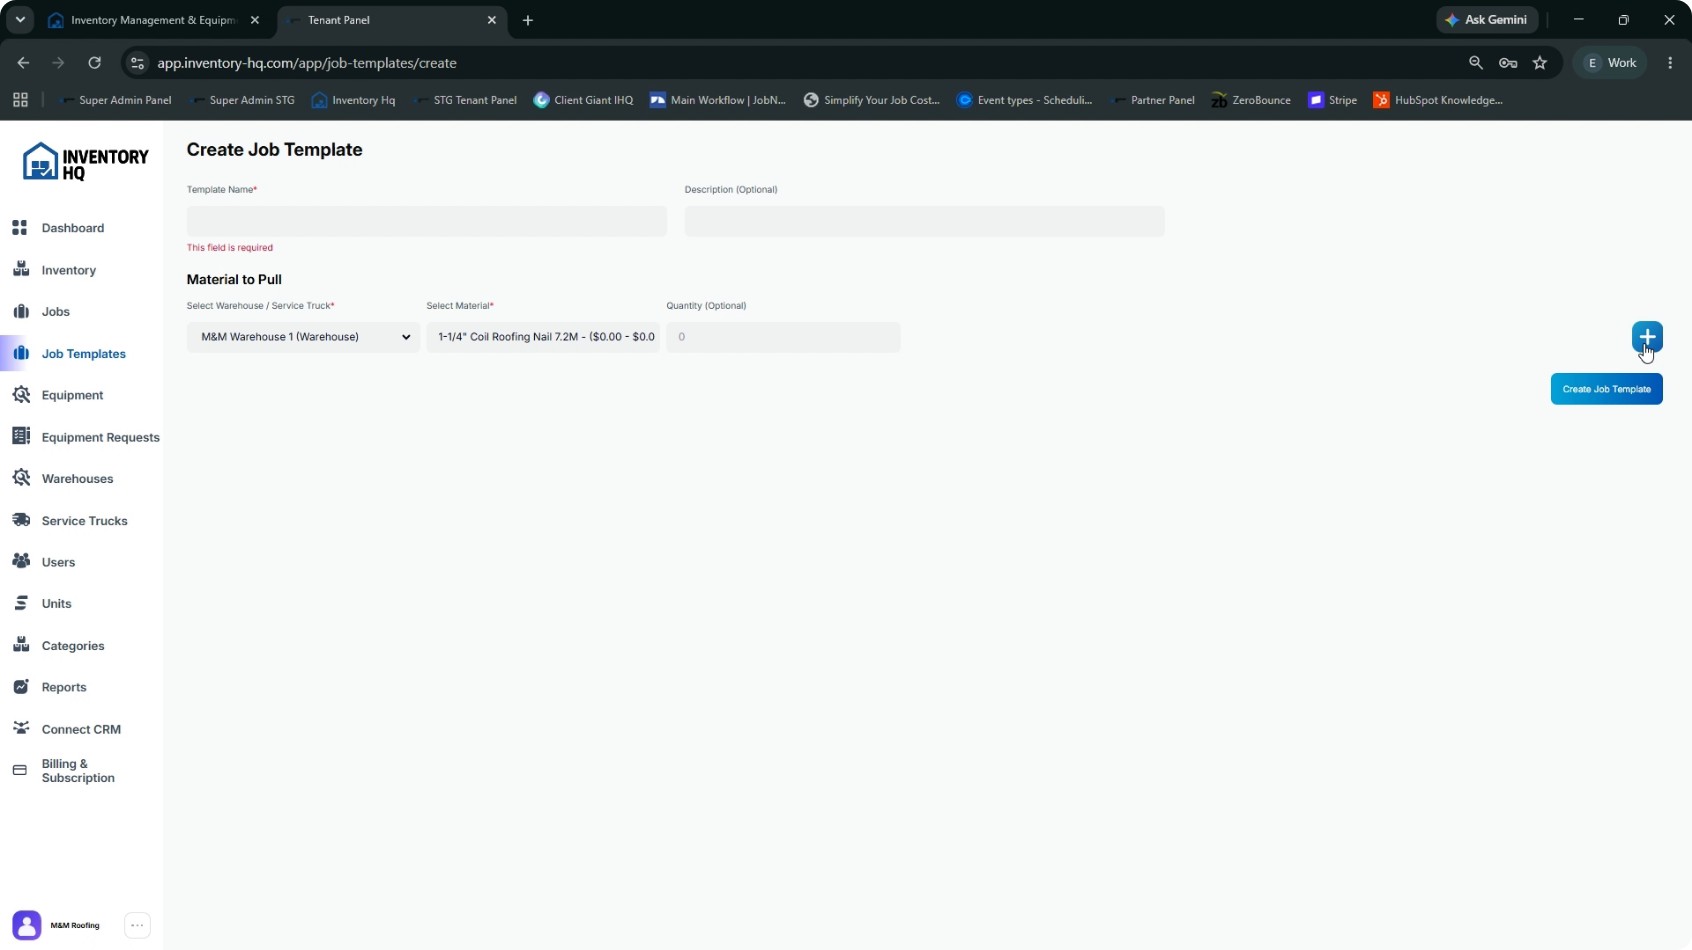
Enter a clear, recognizable name for the template (for example, “Standard Install” or “Repair Kit”) so crews know when to use it. Optionally, add a description to provide more context about when and how this template should be used.
- 4
Choose the Warehouse
Select the specific warehouse from which materials will be pulled for this template.
- 5
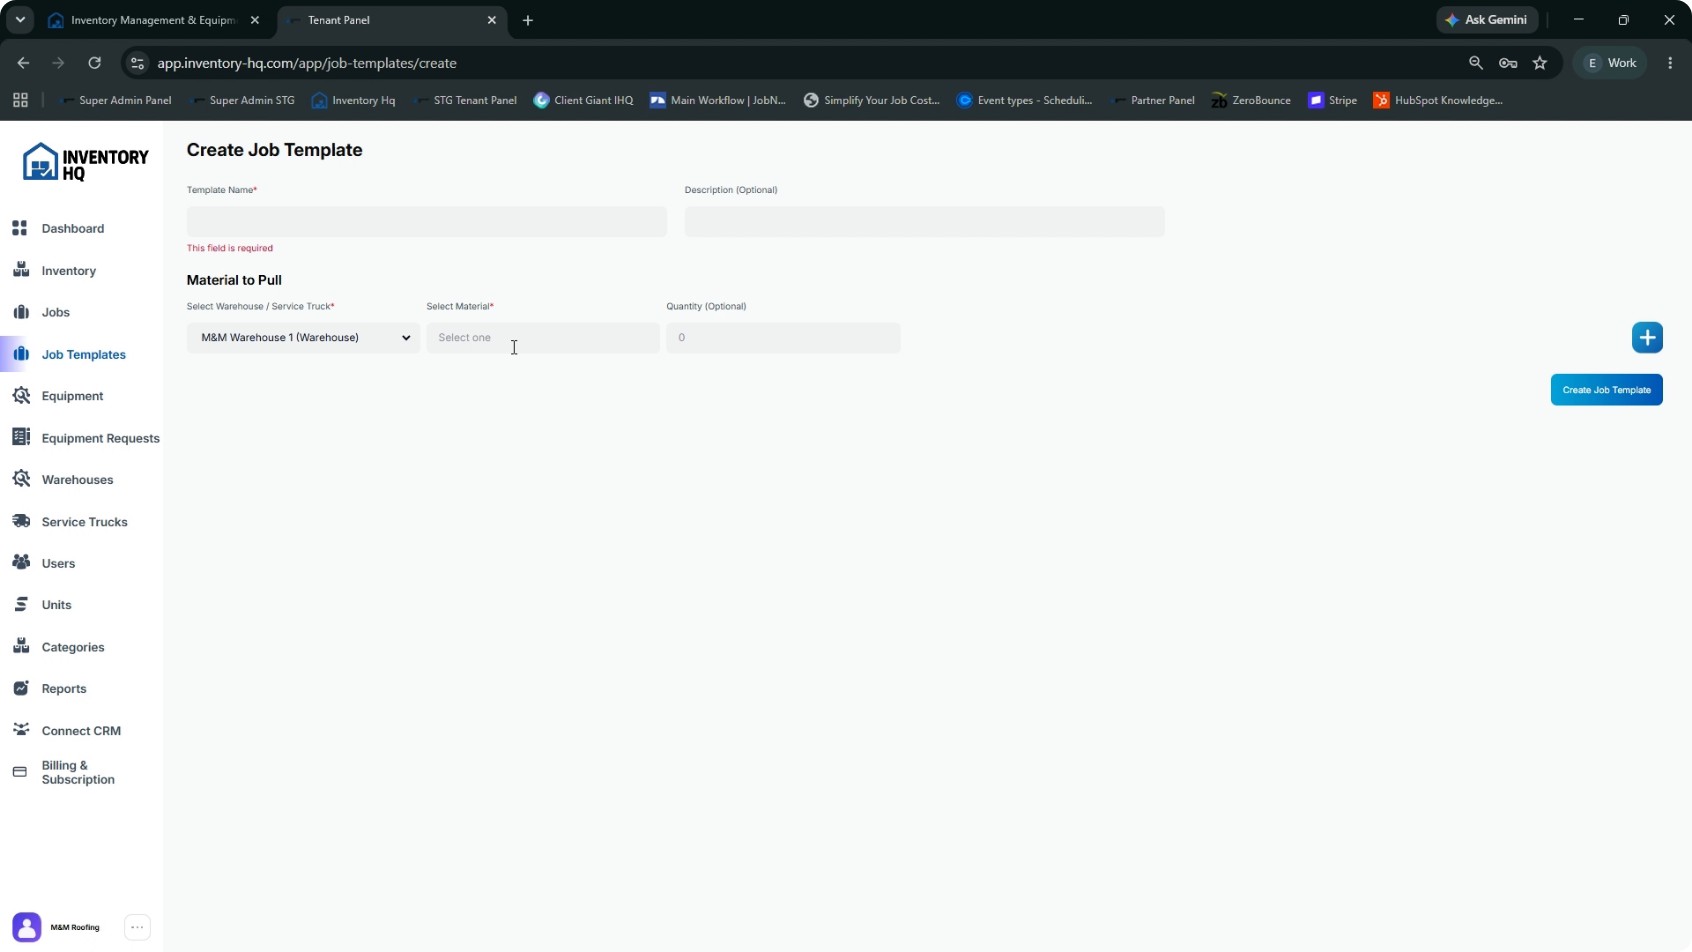
Add Materials and Quantities
Select your material items to include in the template. For each material, set a quantity if it is usually the same for every job. If job sizes vary, leave the quantity field blank so the crew can fill in the exact quantity on the day of the job.
- 6
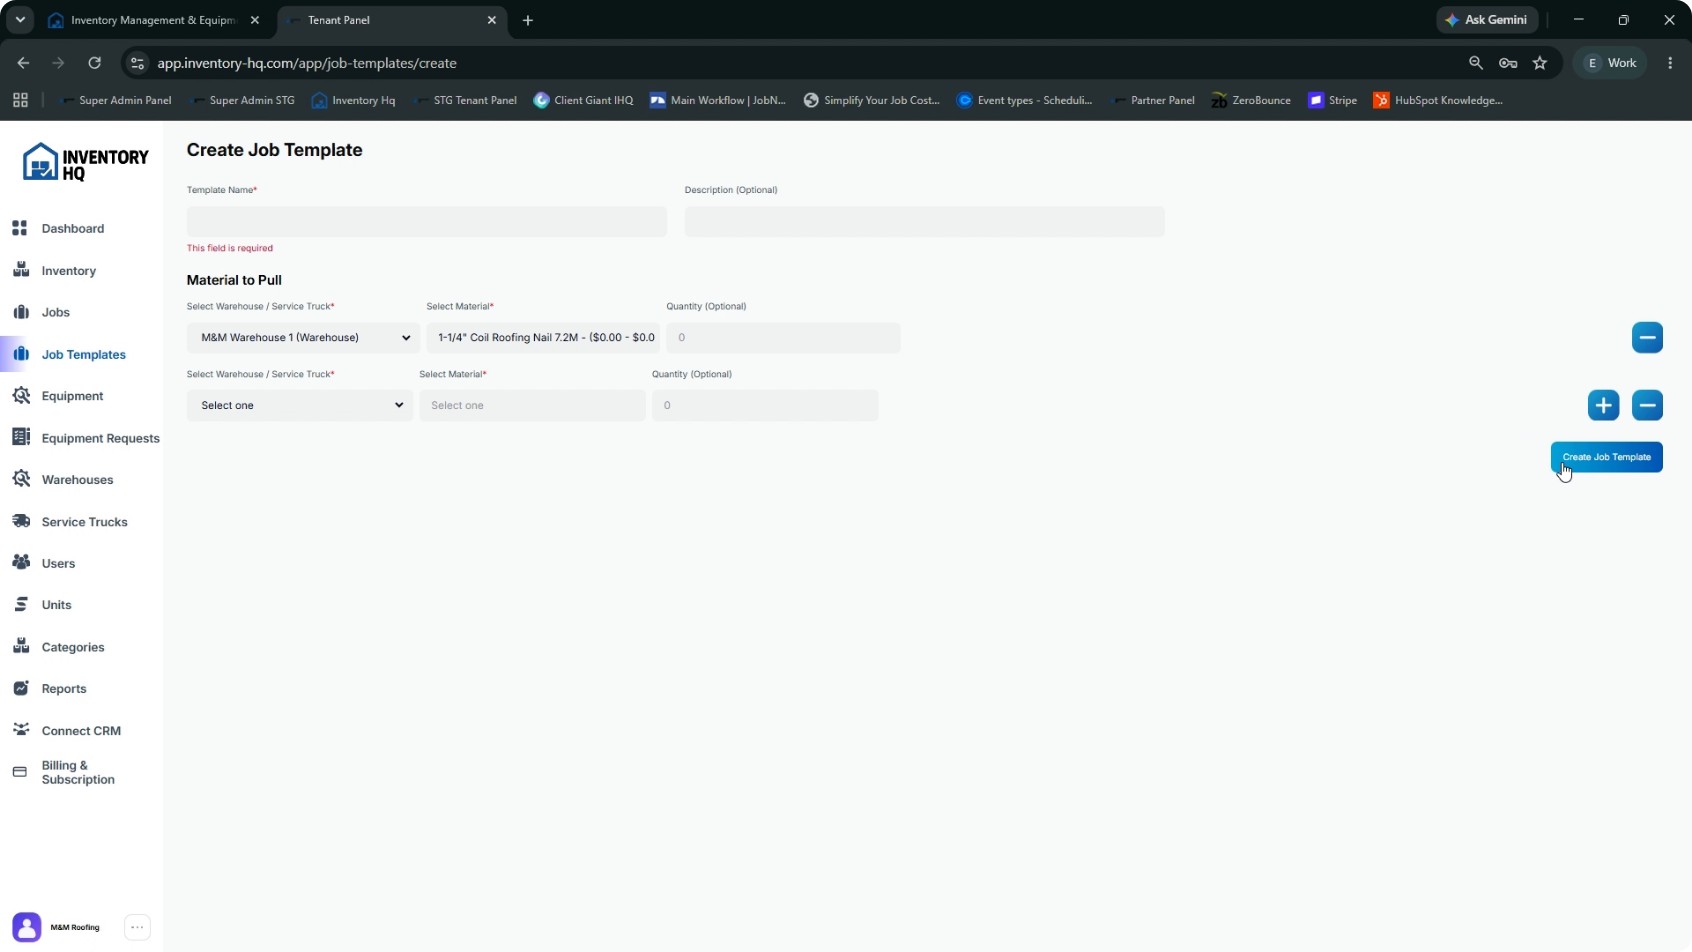
Add Additional Material Lines
If you need to add more materials, click the plus (+) icon to insert additional lines and continue adding items. When all materials are added, click Create Job Template to save the template.
- 7
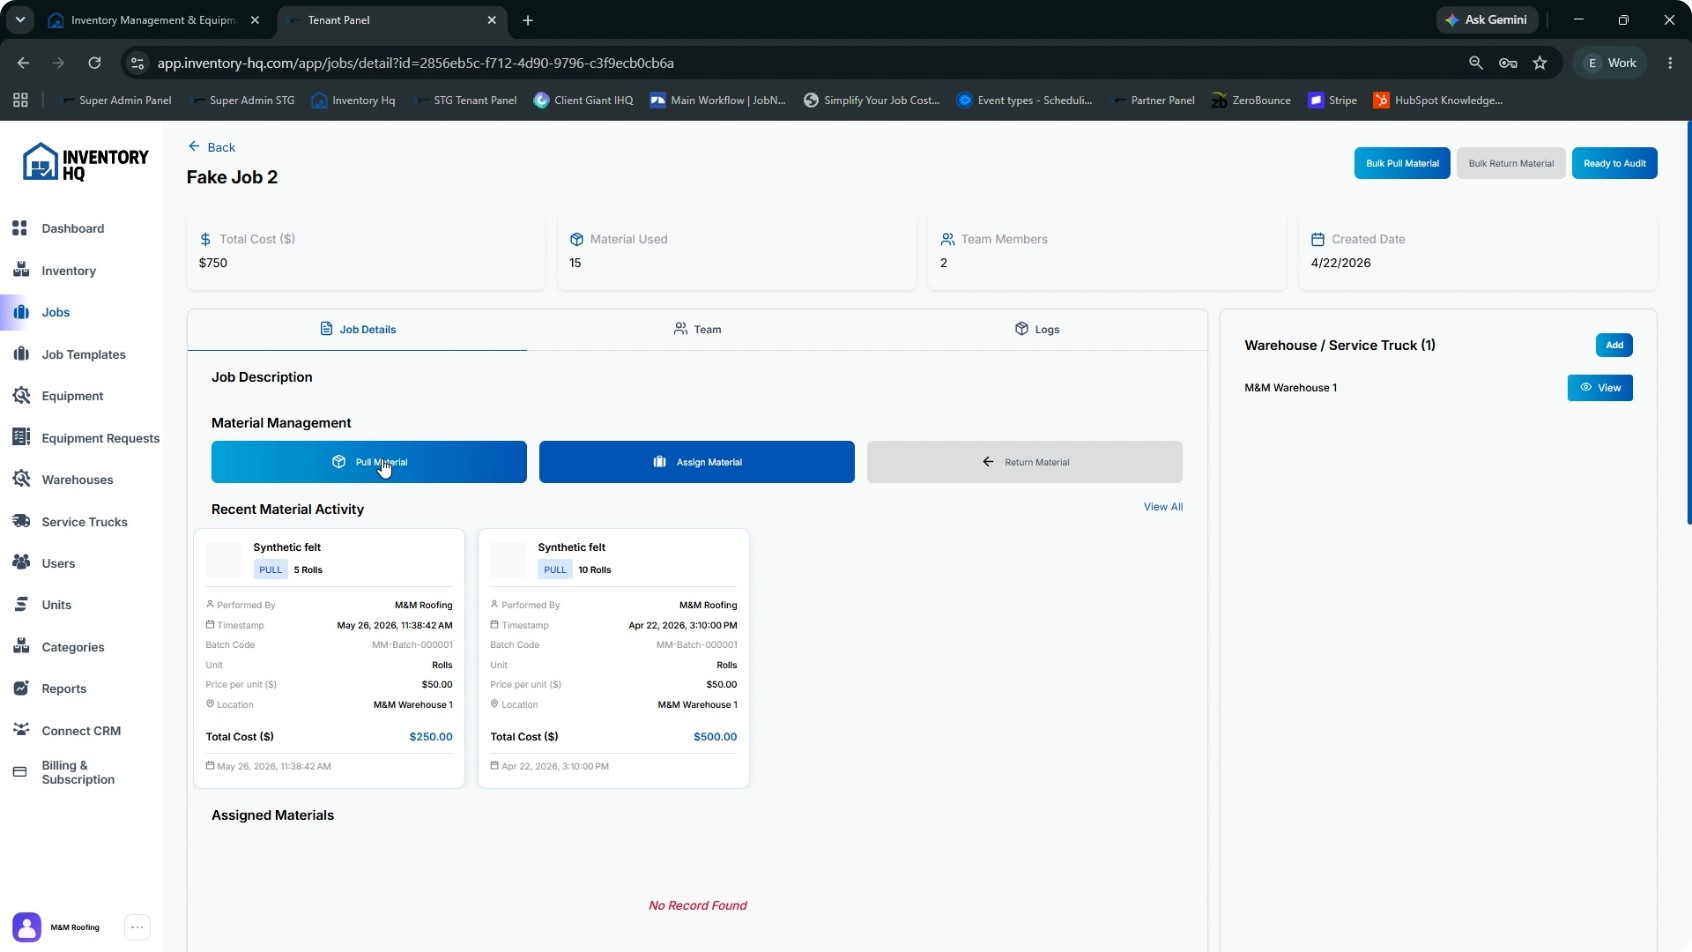
Open a Job and Start Pulling Material
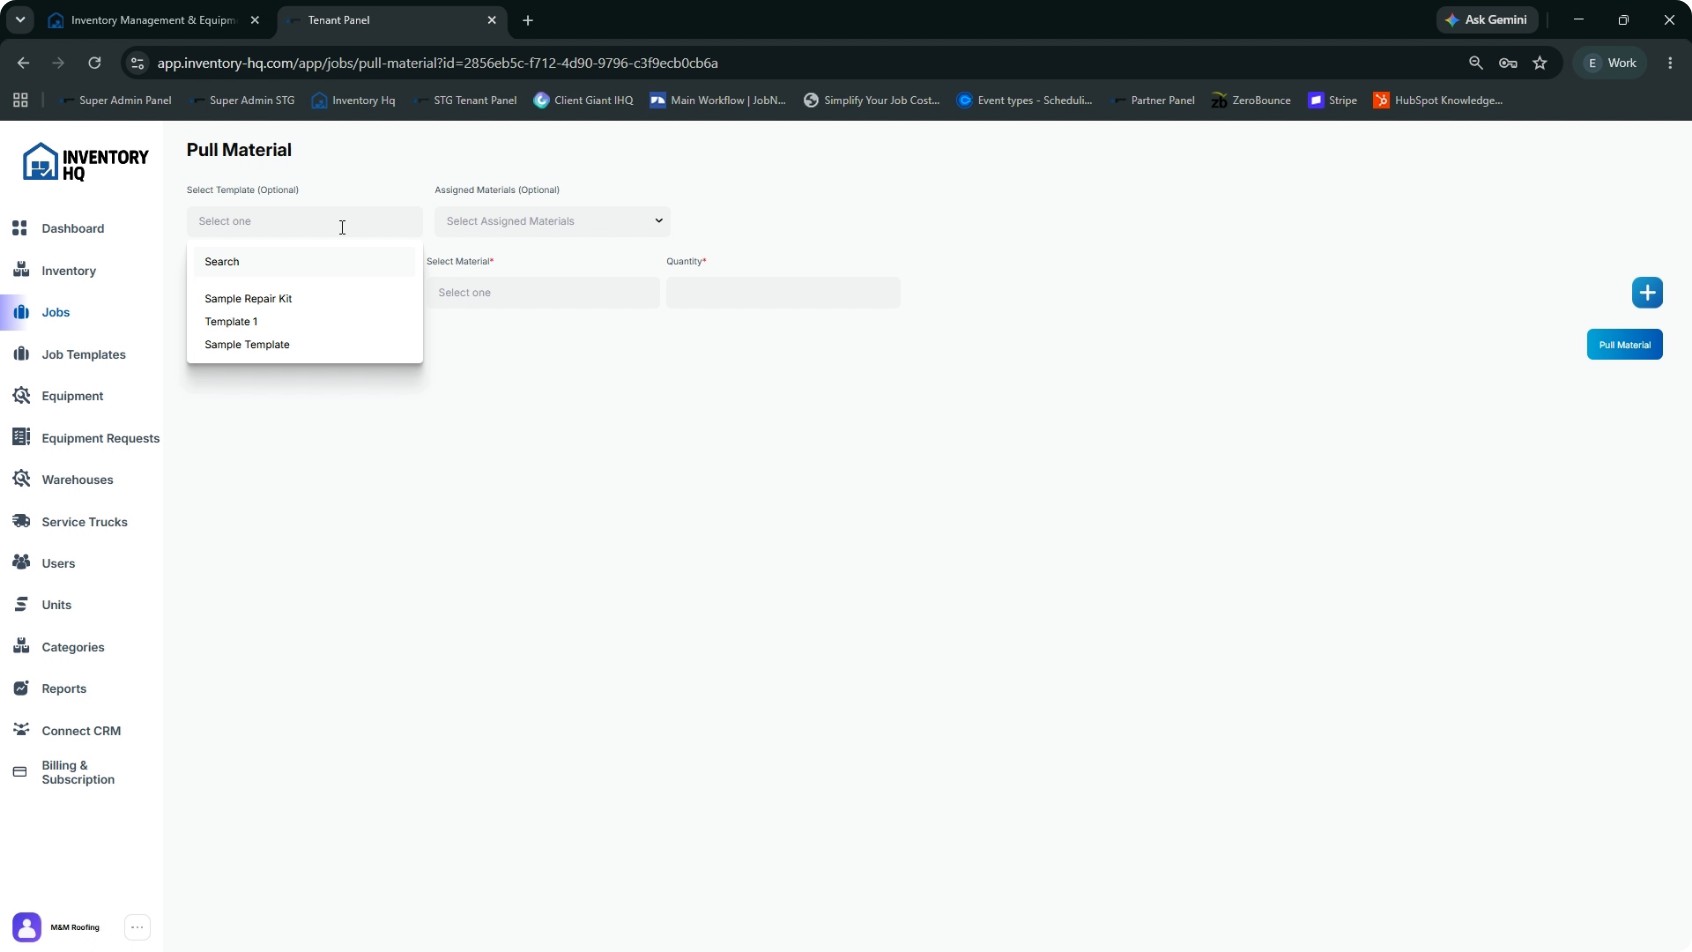
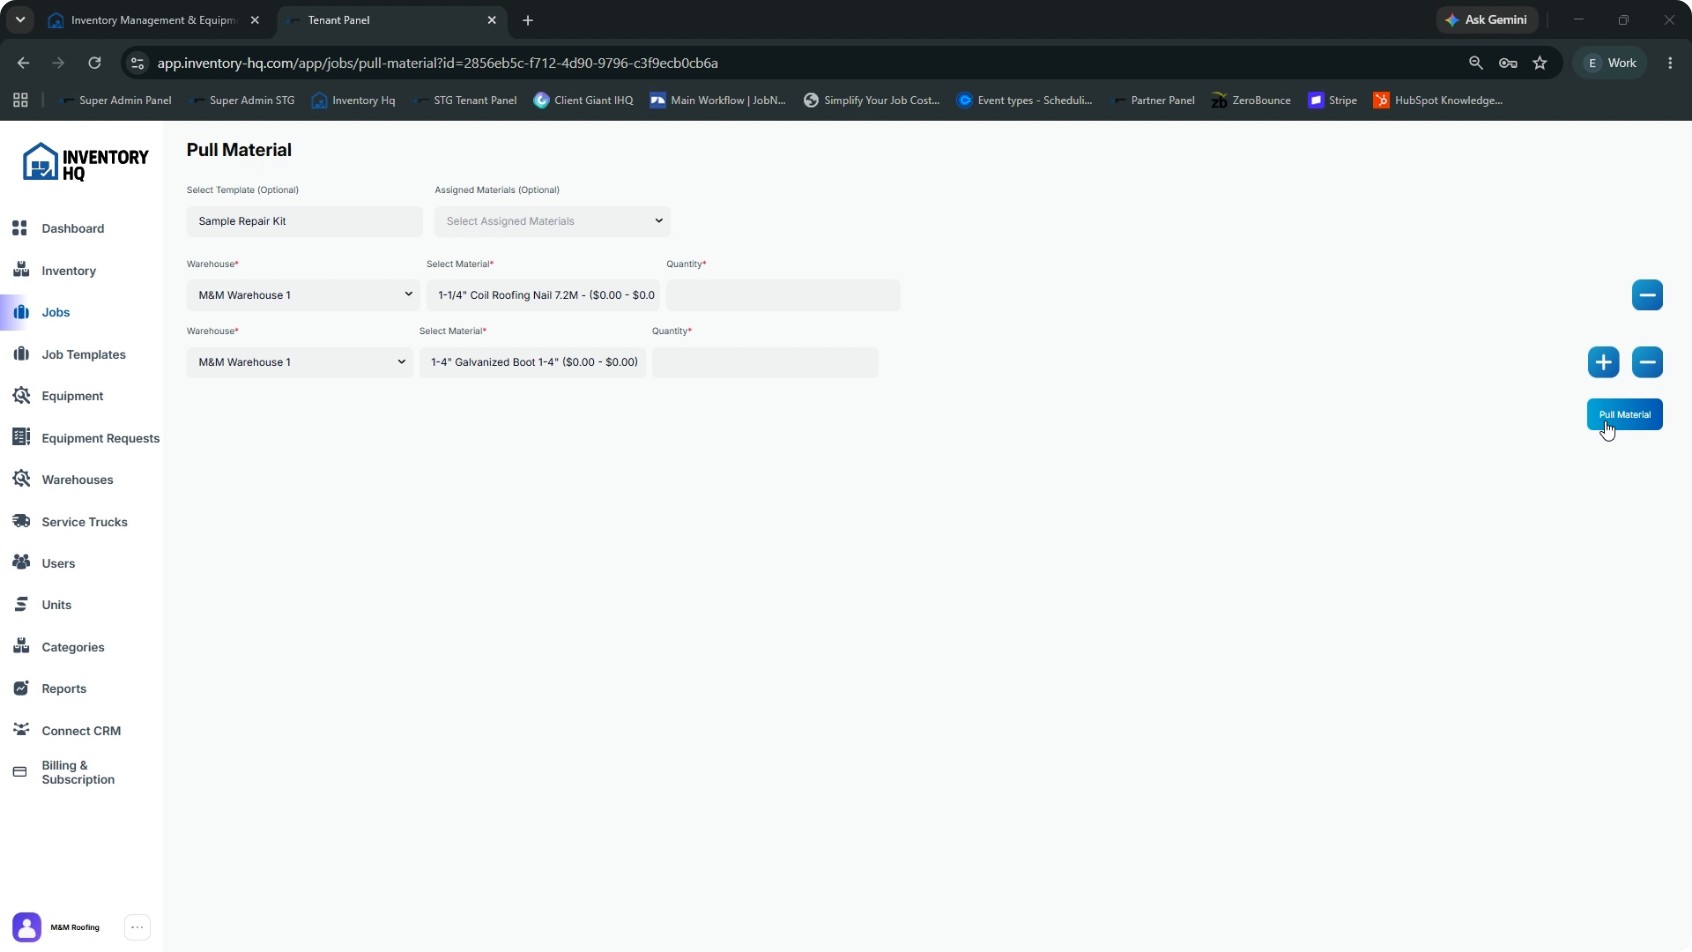
Open the job where you want to use the template. Click Pull Material within the job. From the template dropdown, select the appropriate job template. All material lines from the template will pre-fill automatically. Adjust the quantities as needed for the specific job.
- 8
Complete the Pull
After reviewing and adjusting quantities, click Pull Material to finalize the pull for that job.
Templates can be edited or deleted anytime from the Job Templates page, so update them regularly as your standard job types change.
NEXT TUTORIAL
Connecting InventoryHQ with Leap →