
Connecting InventoryHQ with Leap
This document explains how to connect your Leap account to InventoryHQ so that any job you mark as awarded in Leap is automatically created in InventoryHQ. Once configured, no manual data entry is needed, and the setup typically takes 10–15 minutes.
Step by step
- 1
Generate an API Token in Leap
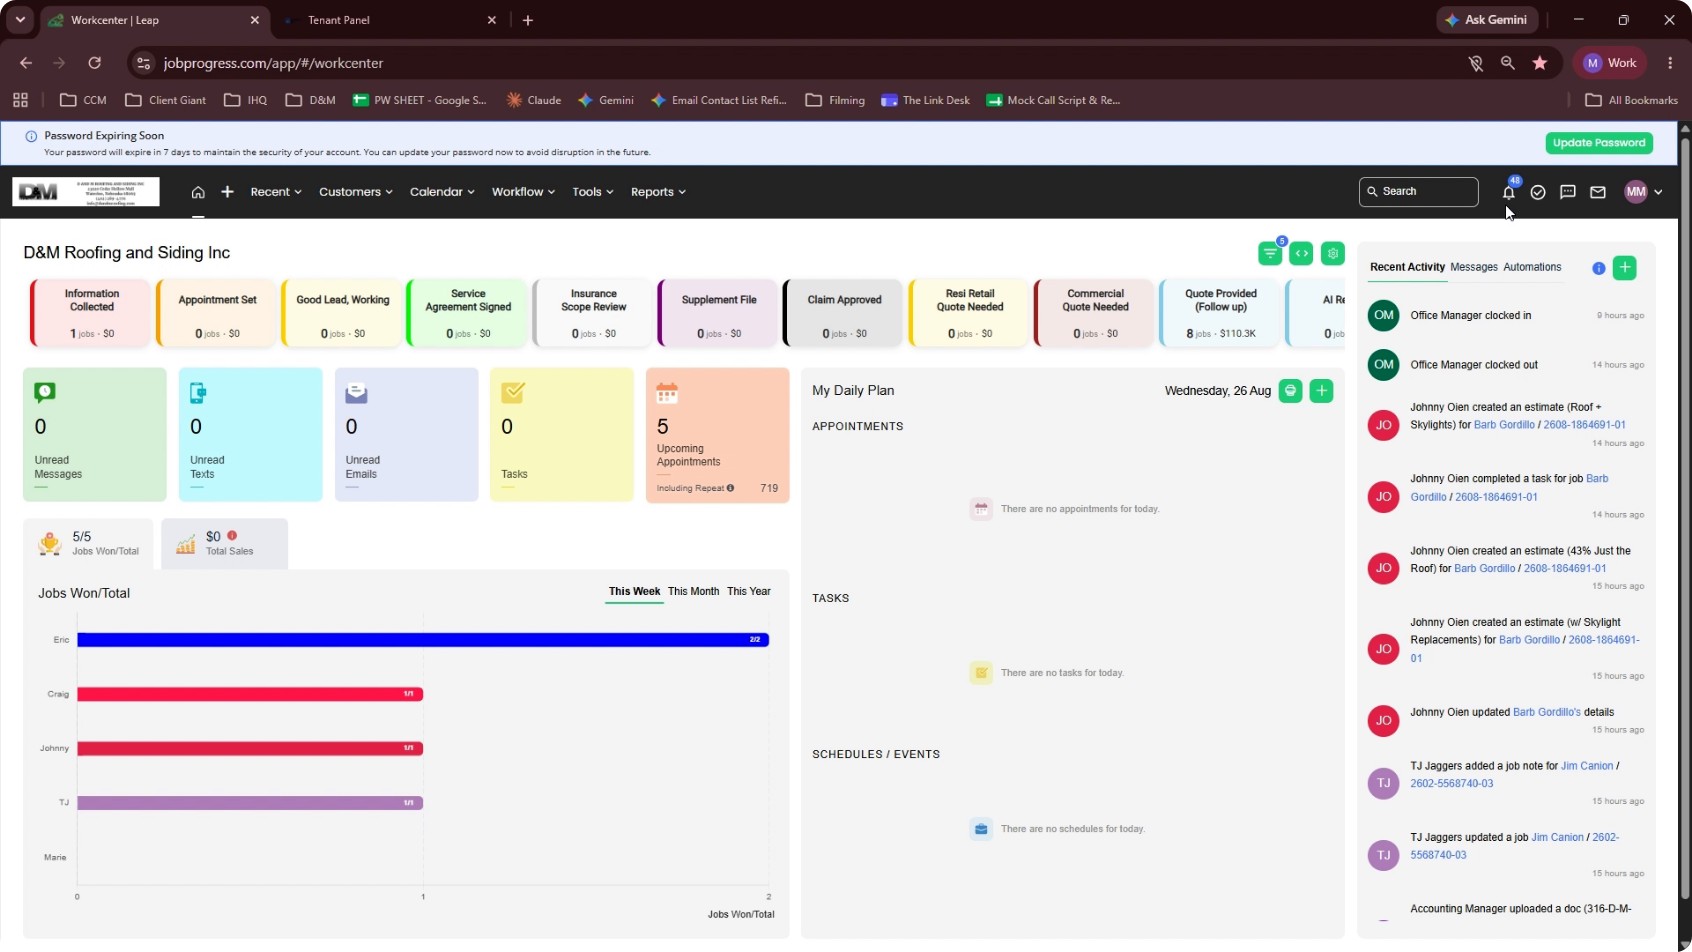
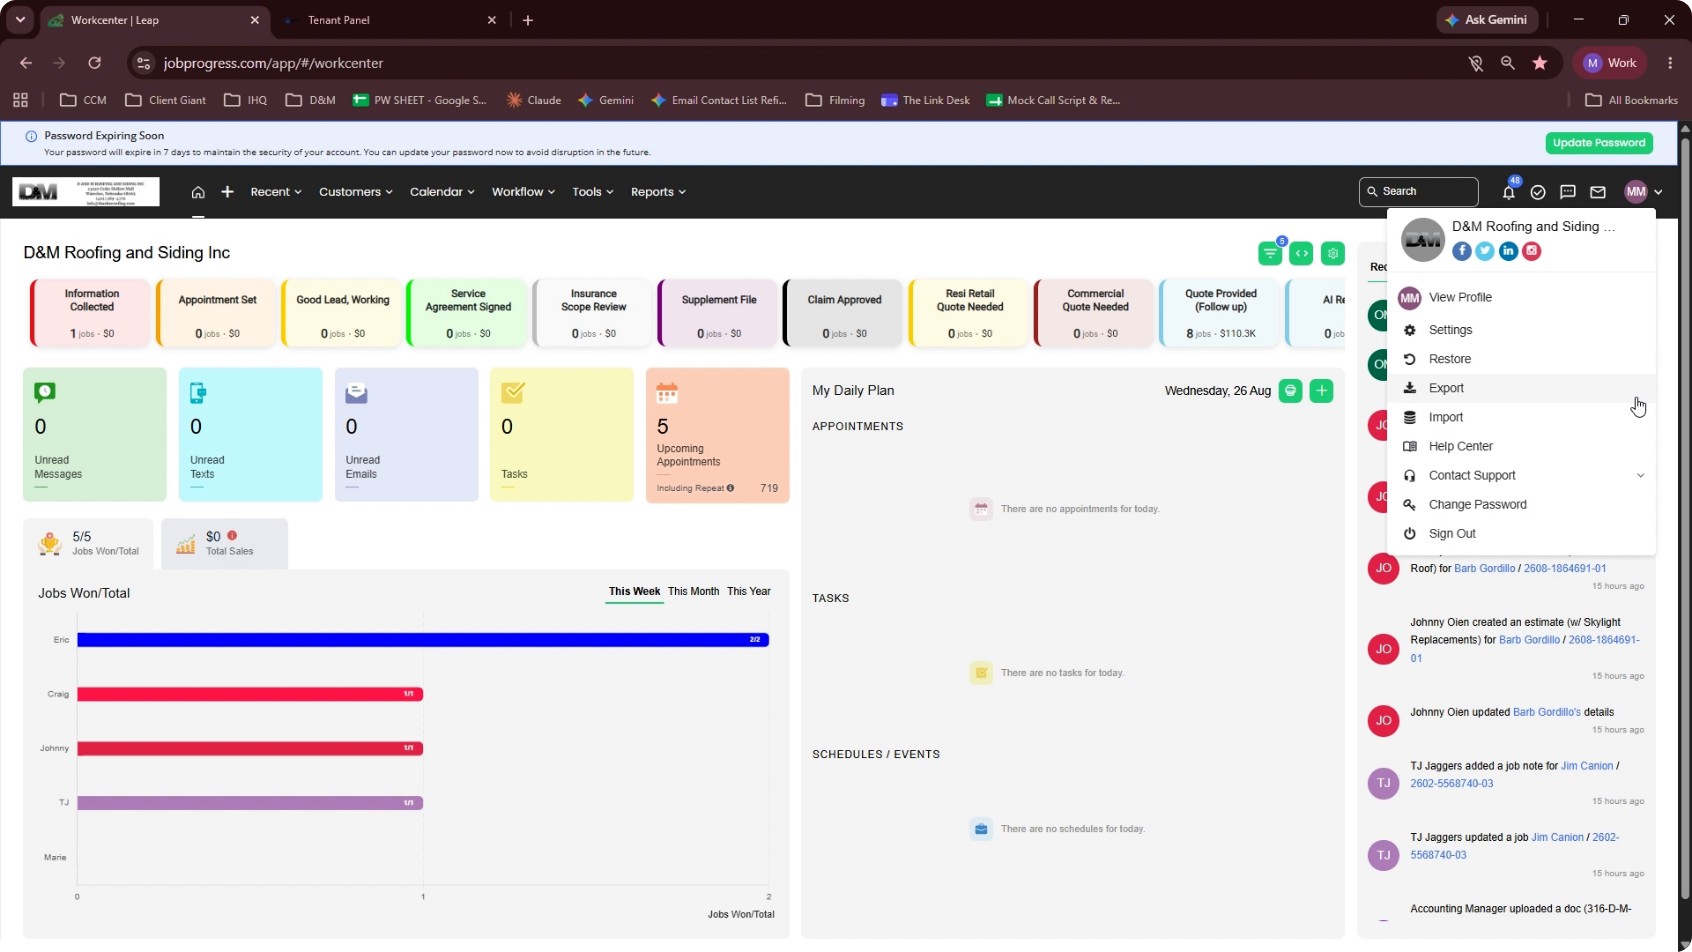
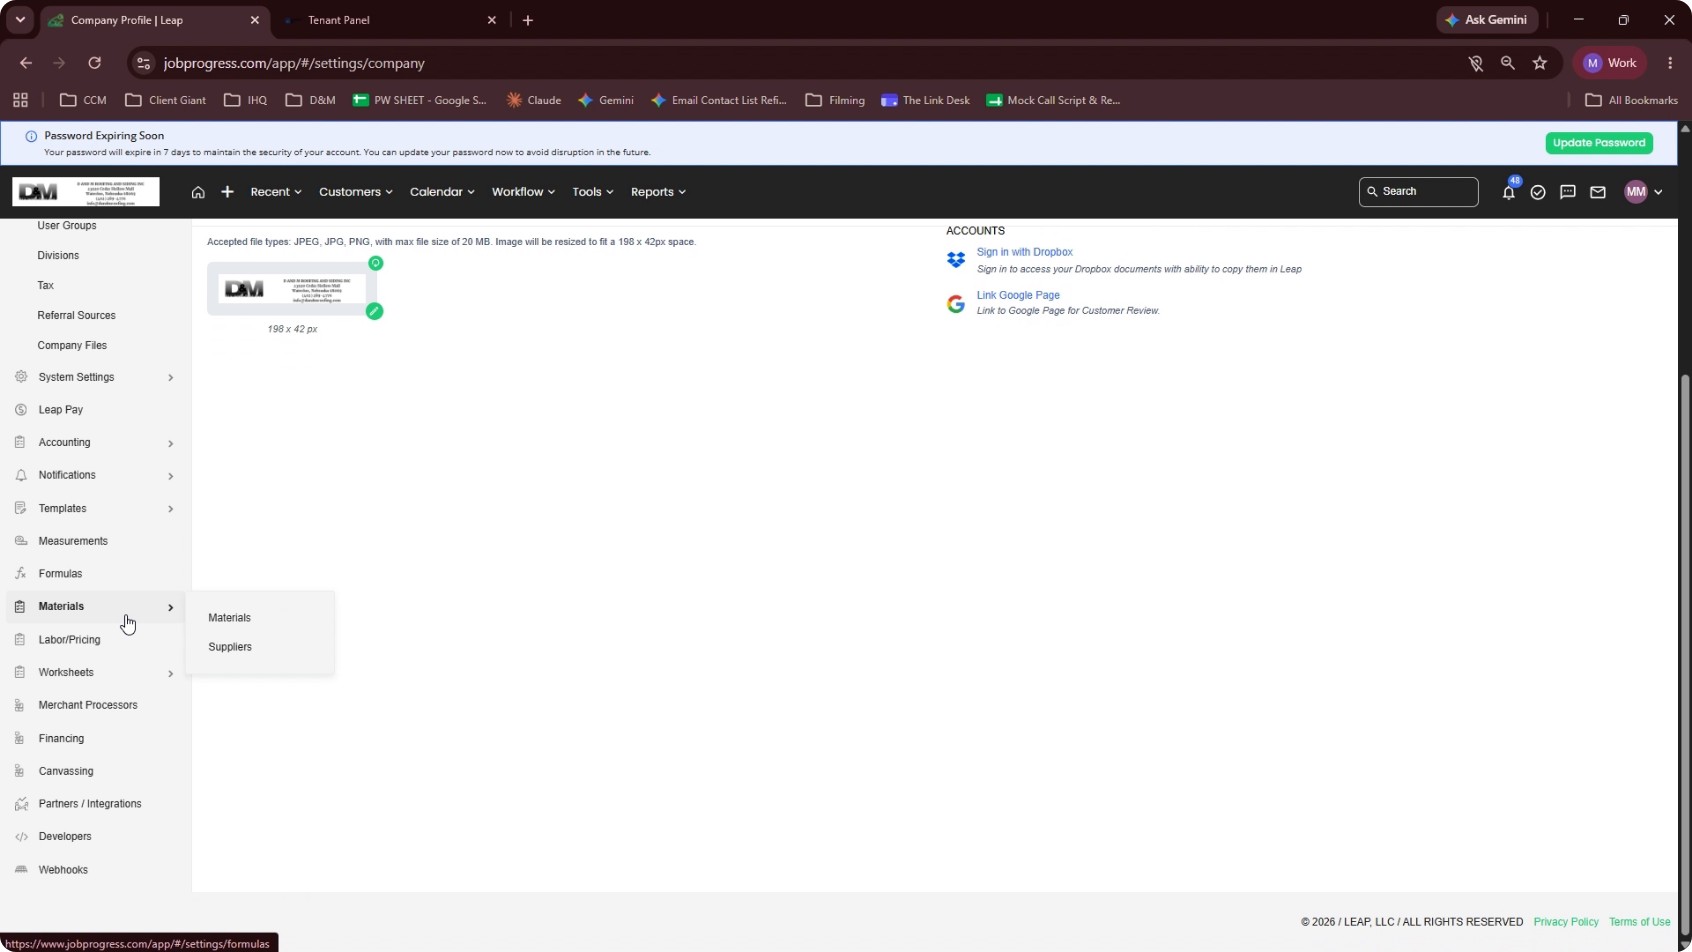
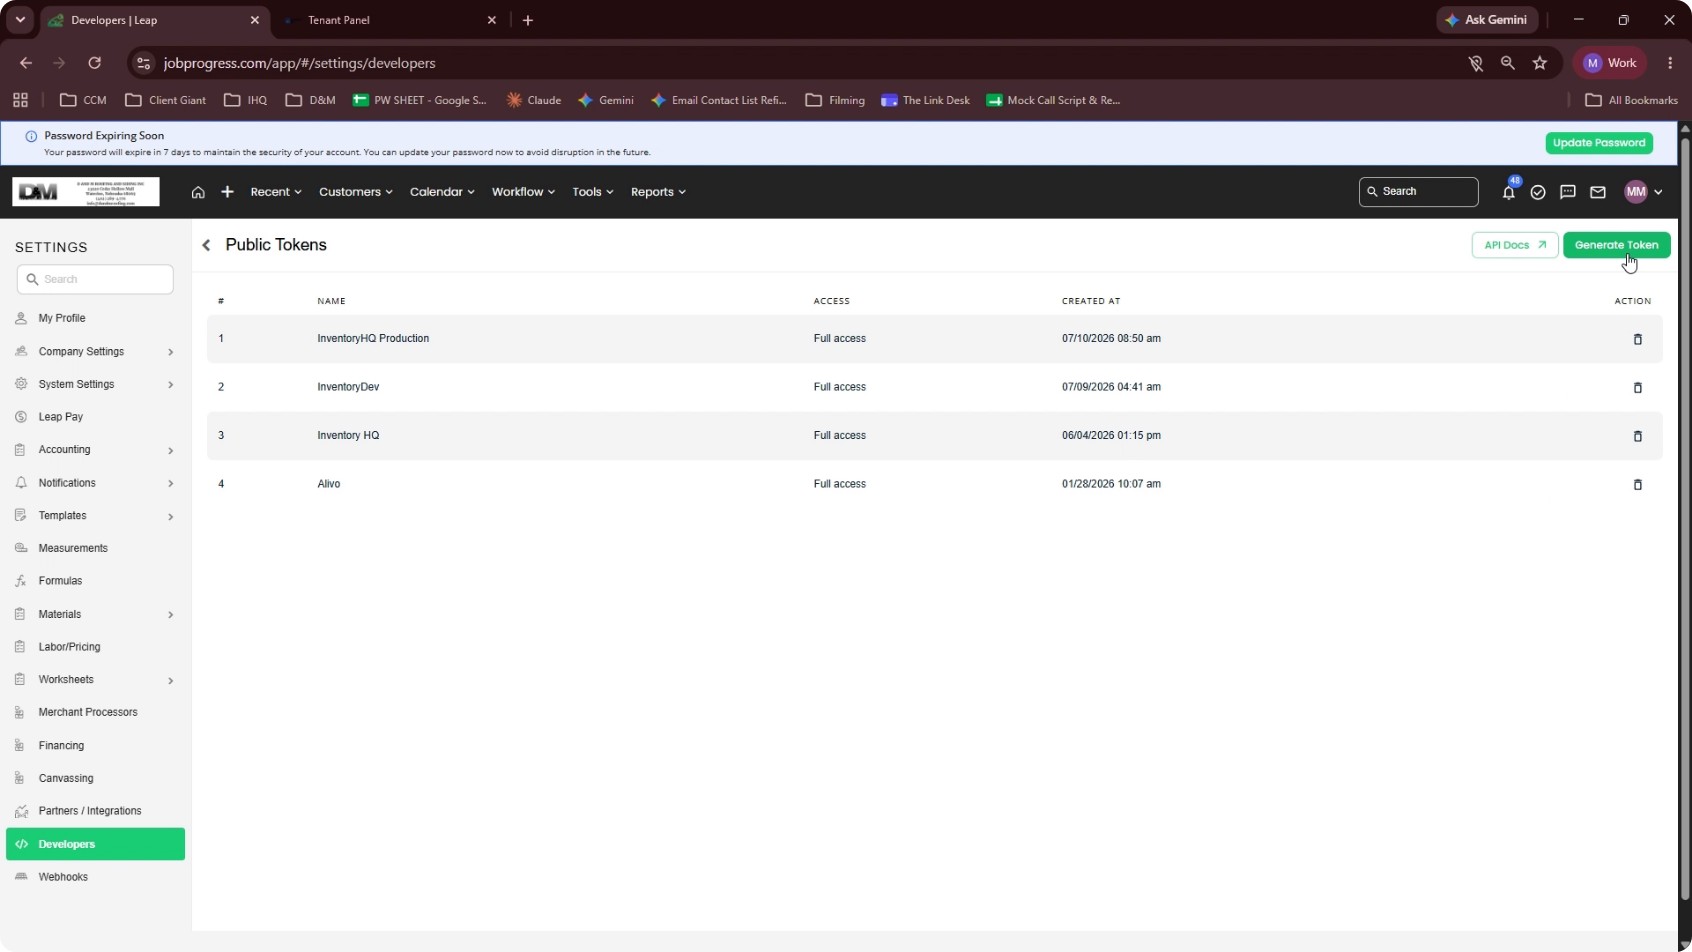
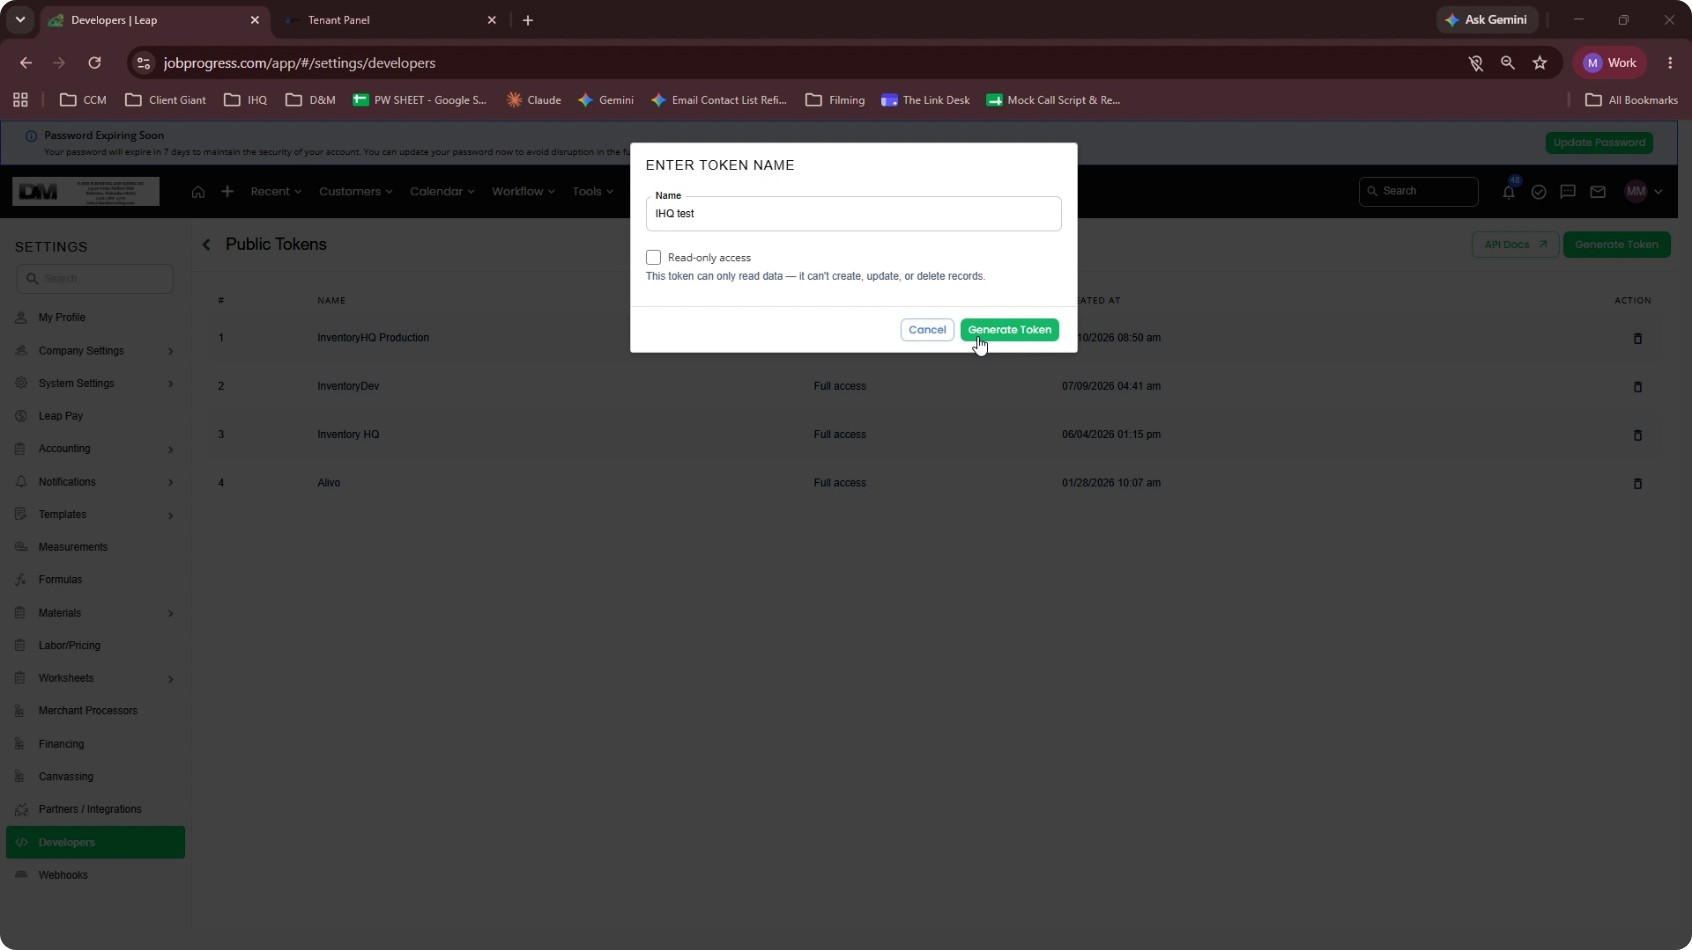
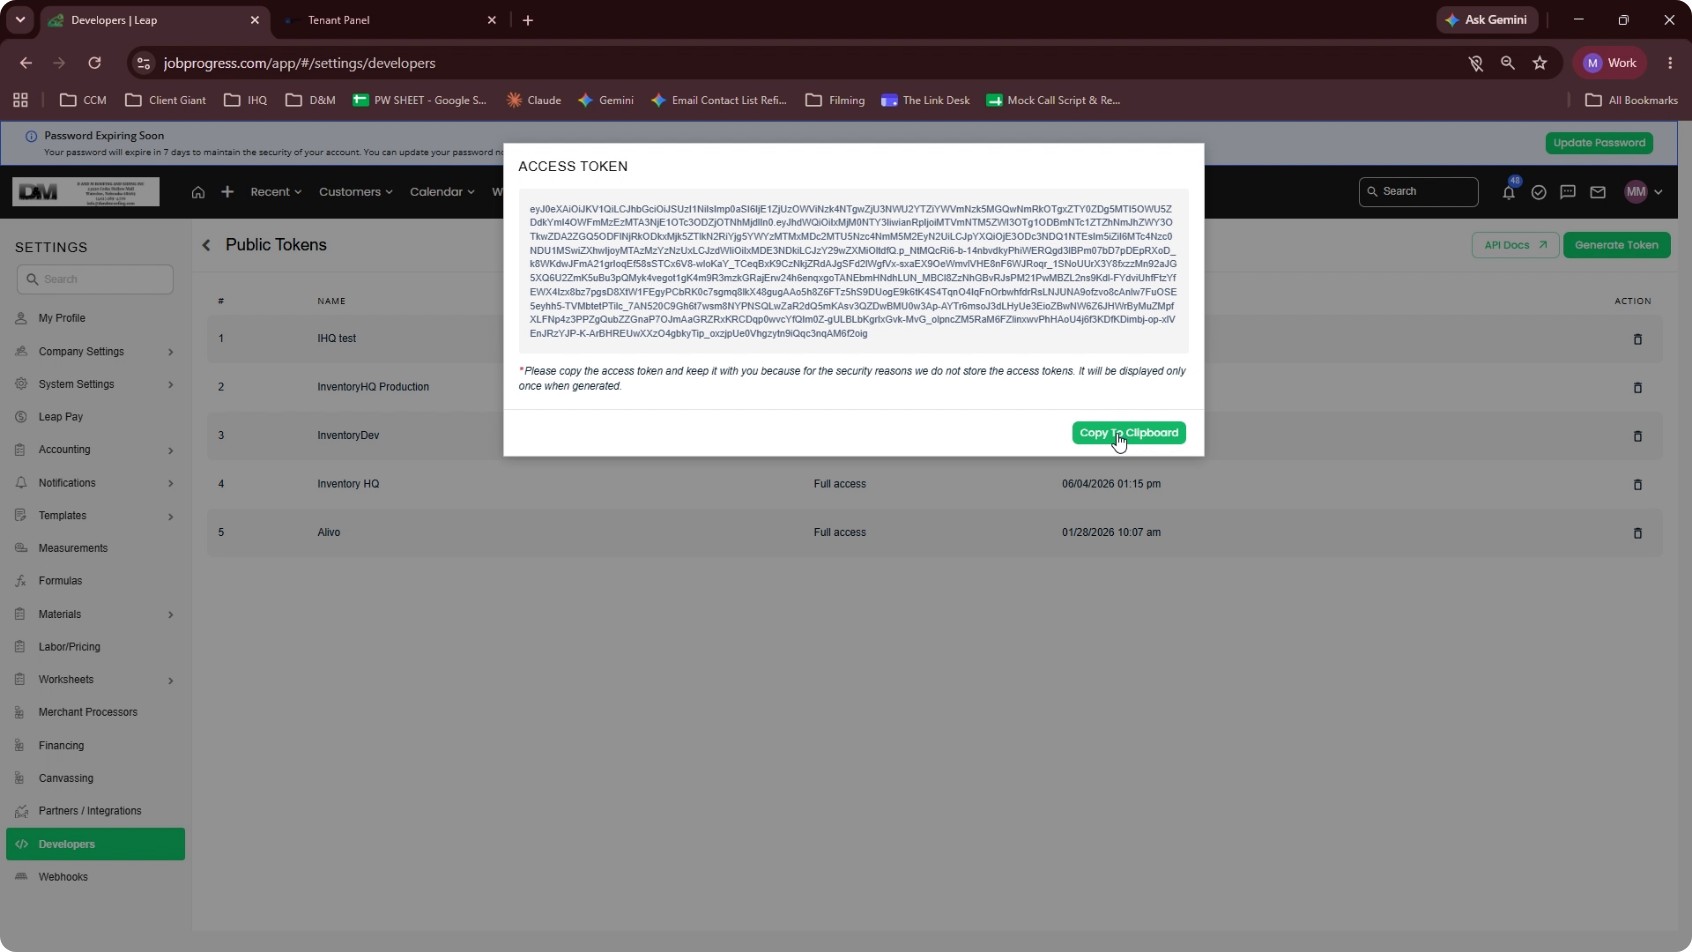
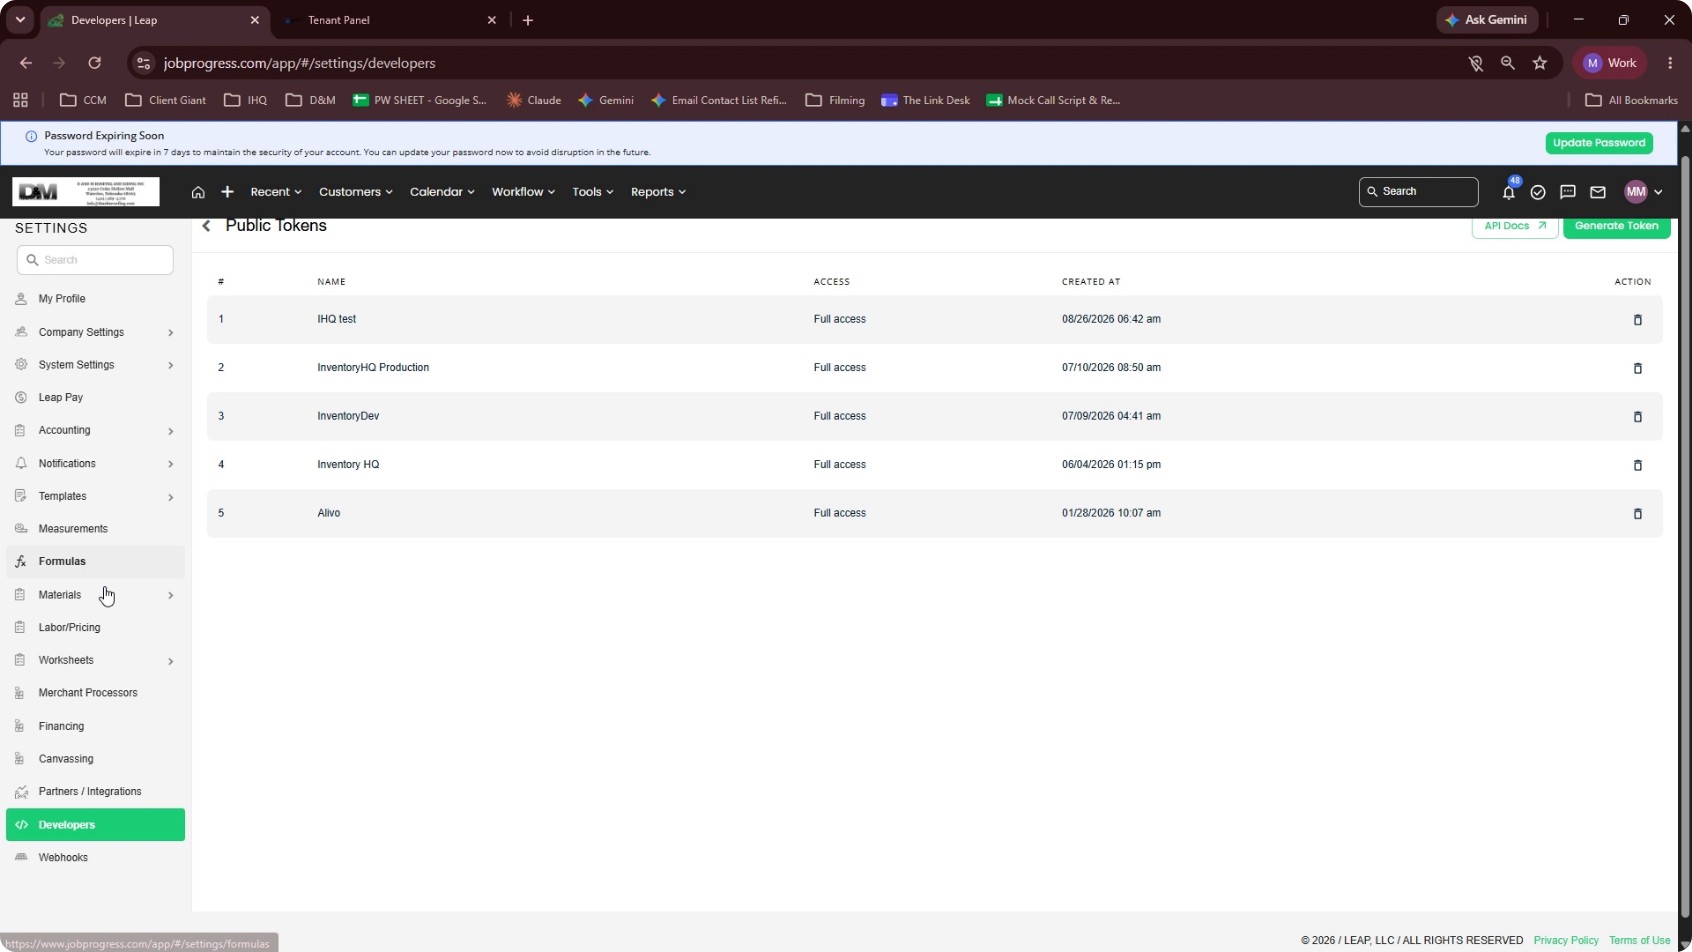
In Leap, open the main menu and go to Settings. From the Settings area, open the Developers section in the side panel. Click Generate Token to create a new API token. Enter a token name (for example, InventoryHQ) and then click Generate Token. Copy the generated token and keep it handy; you will need it in InventoryHQ shortly.
- 2
Connect Leap in InventoryHQ Using the API Token
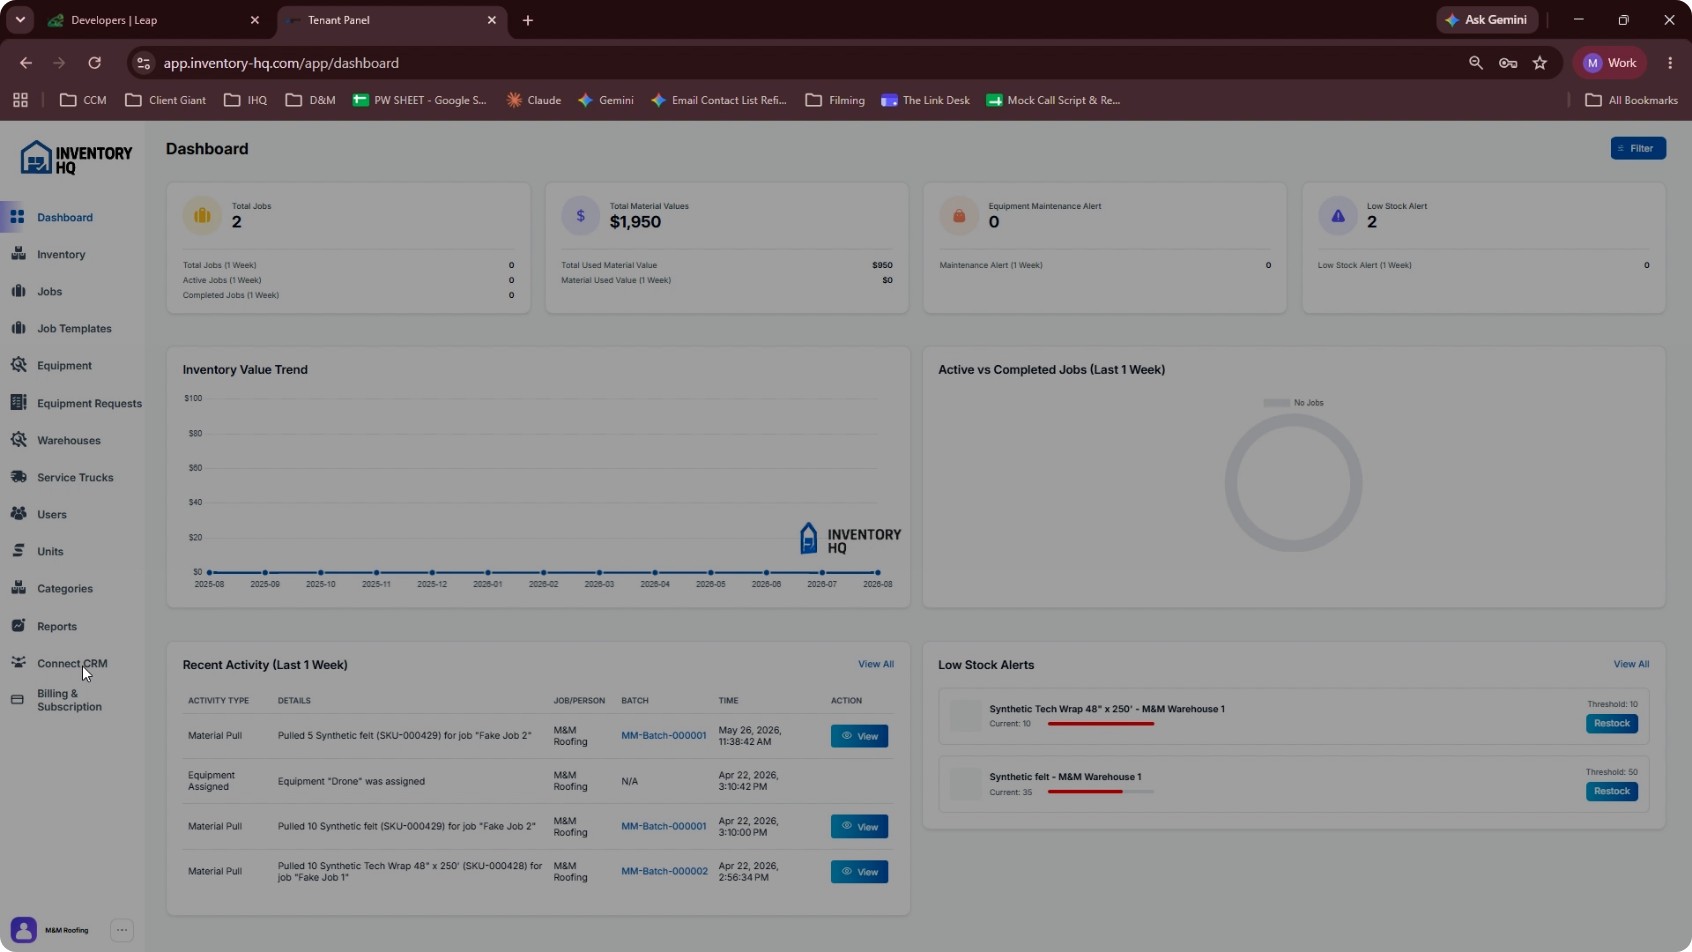
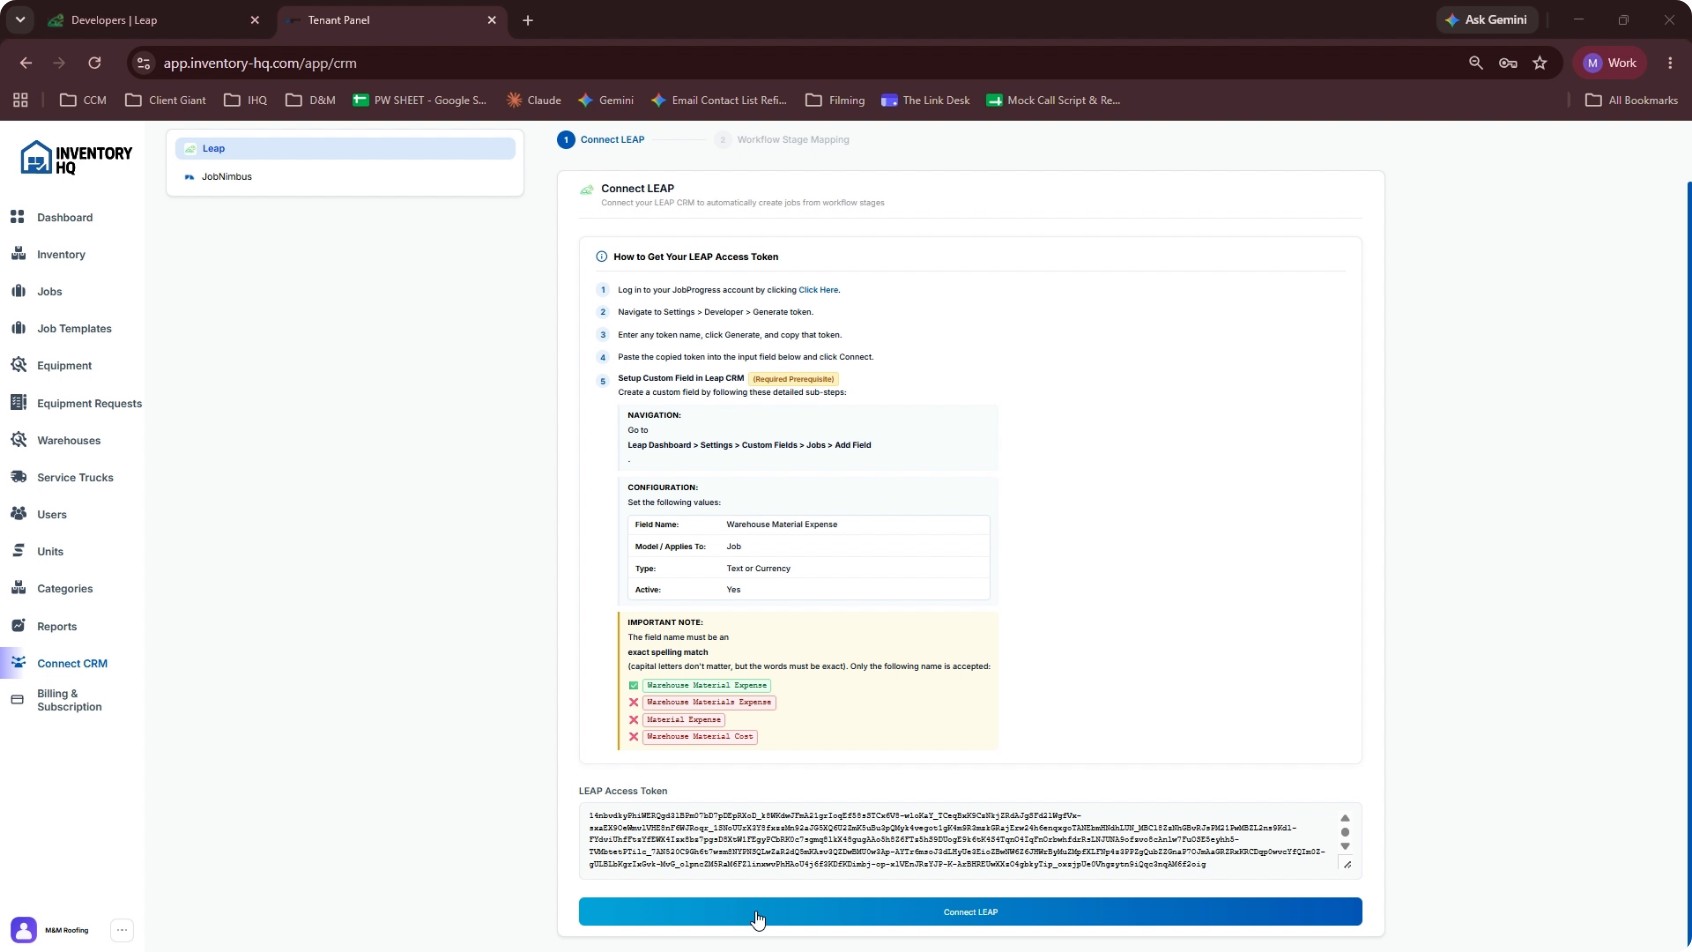
In InventoryHQ, go to the side panel and click Connect CRM. Then select Leap from the available CRM options. Scroll down to the token field and paste the Leap API token you copied in Step 1. Click Connect Leap to verify and save the connection. If token verification fails, confirm that:
- The token was copied correctly from Leap, and
- API access is fully enabled in Leap.
If needed, regenerate a new API token in Leap and paste it here again.
- 3
Configure Workflow Stage Mapping
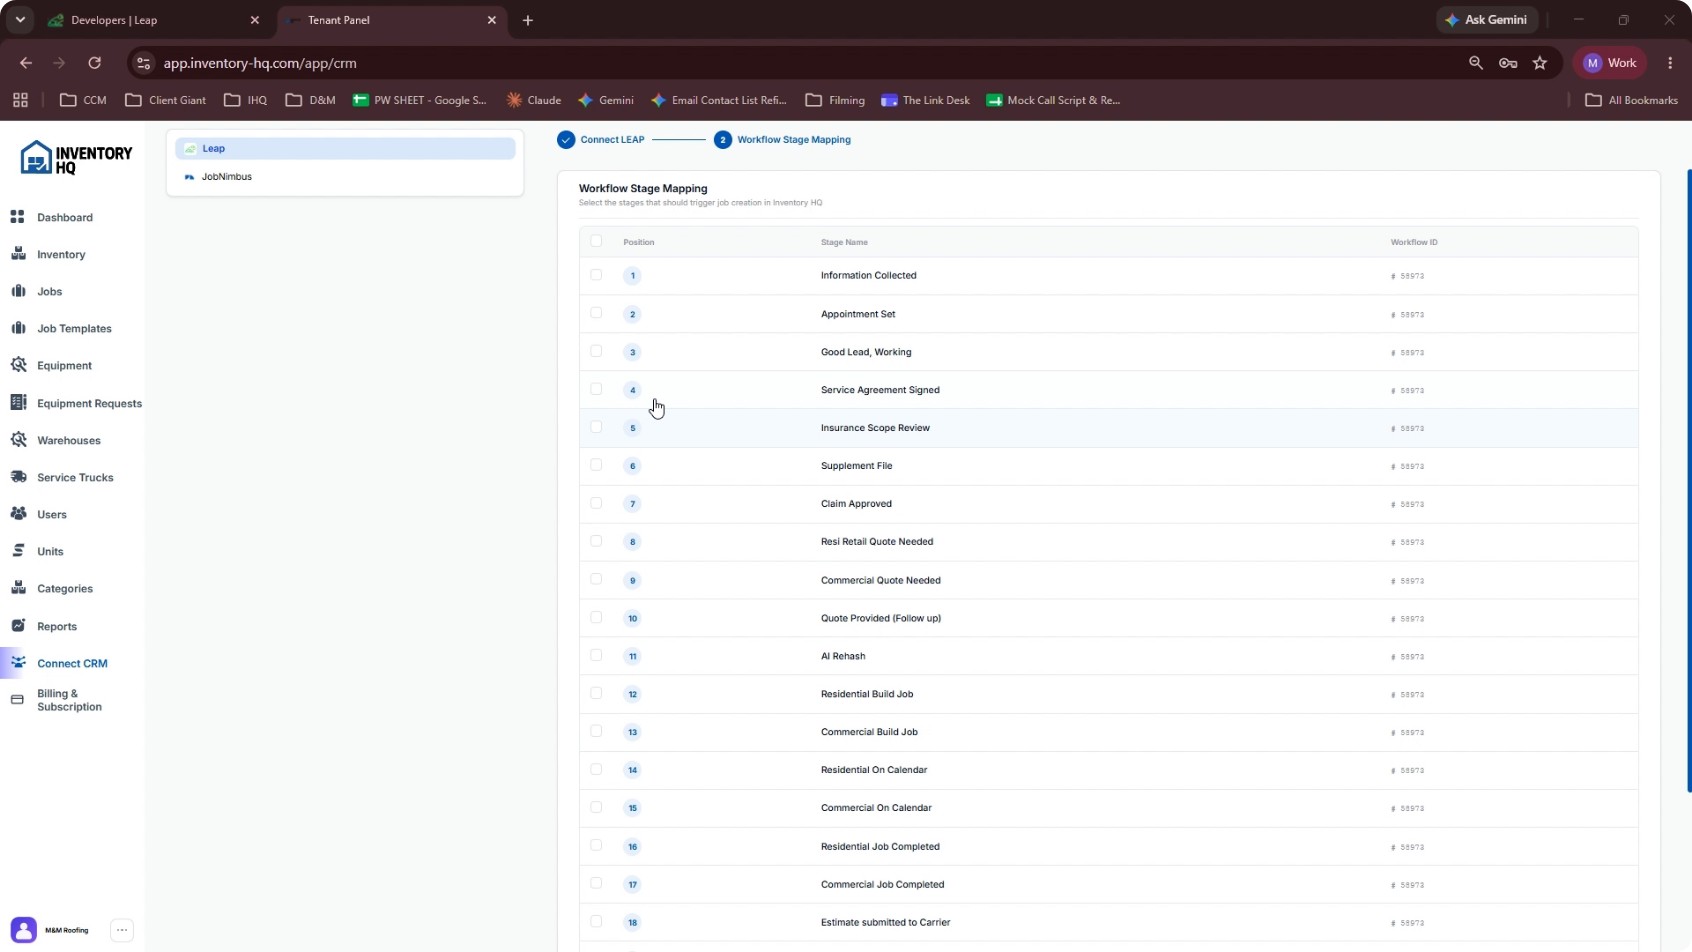
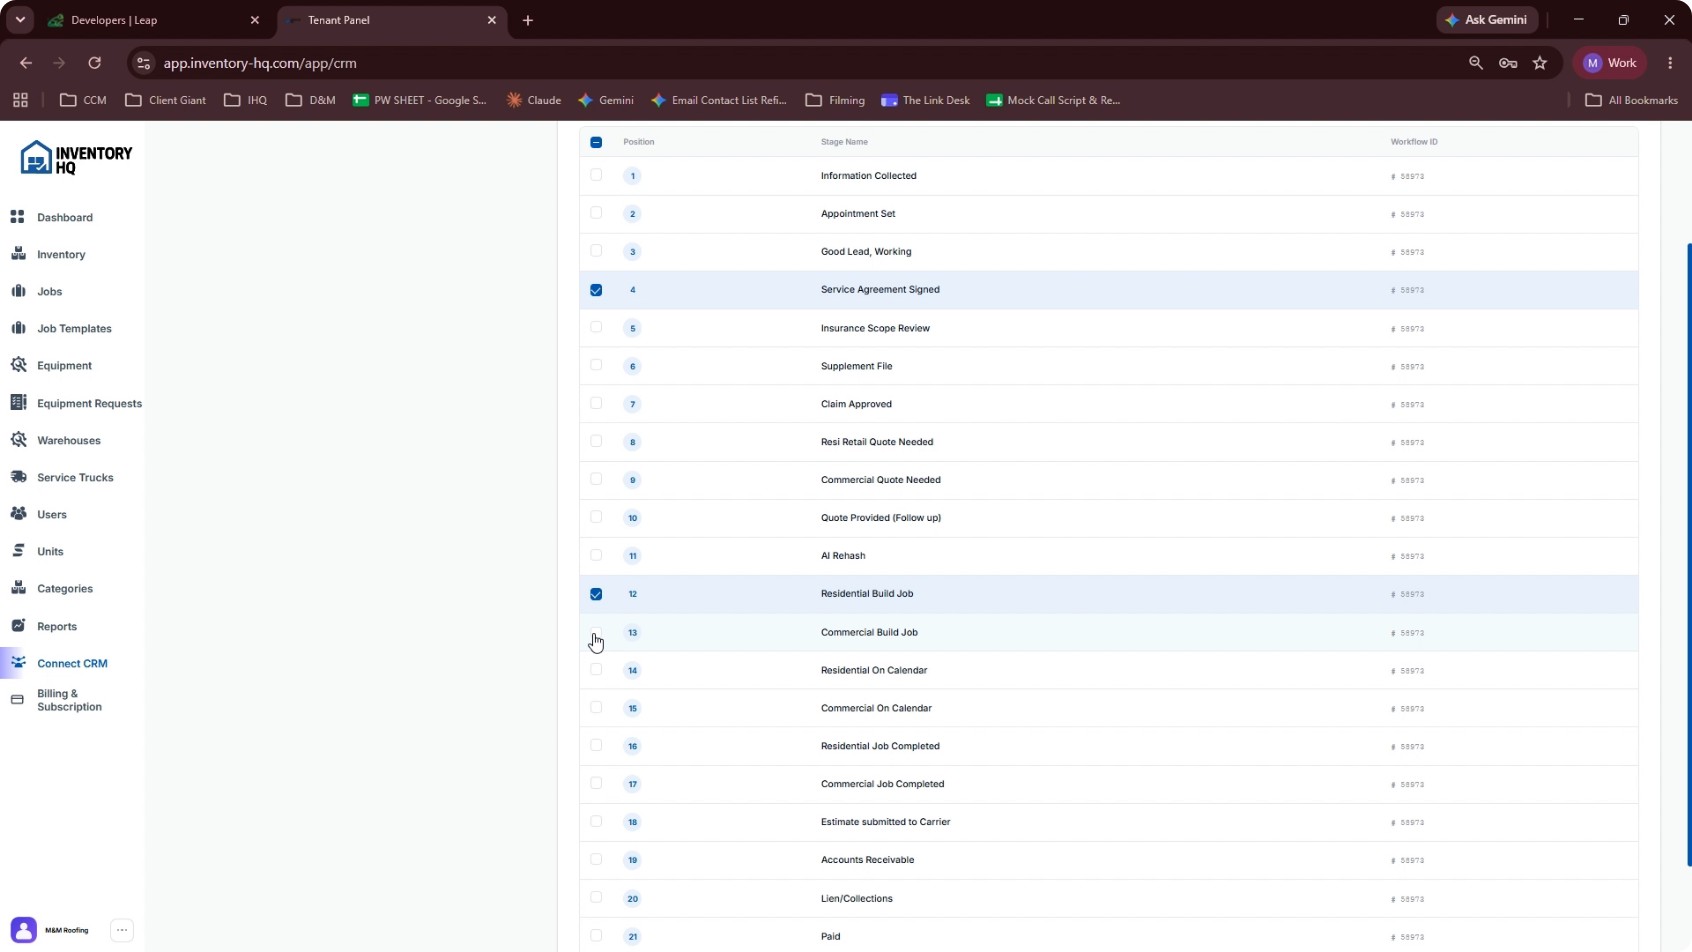
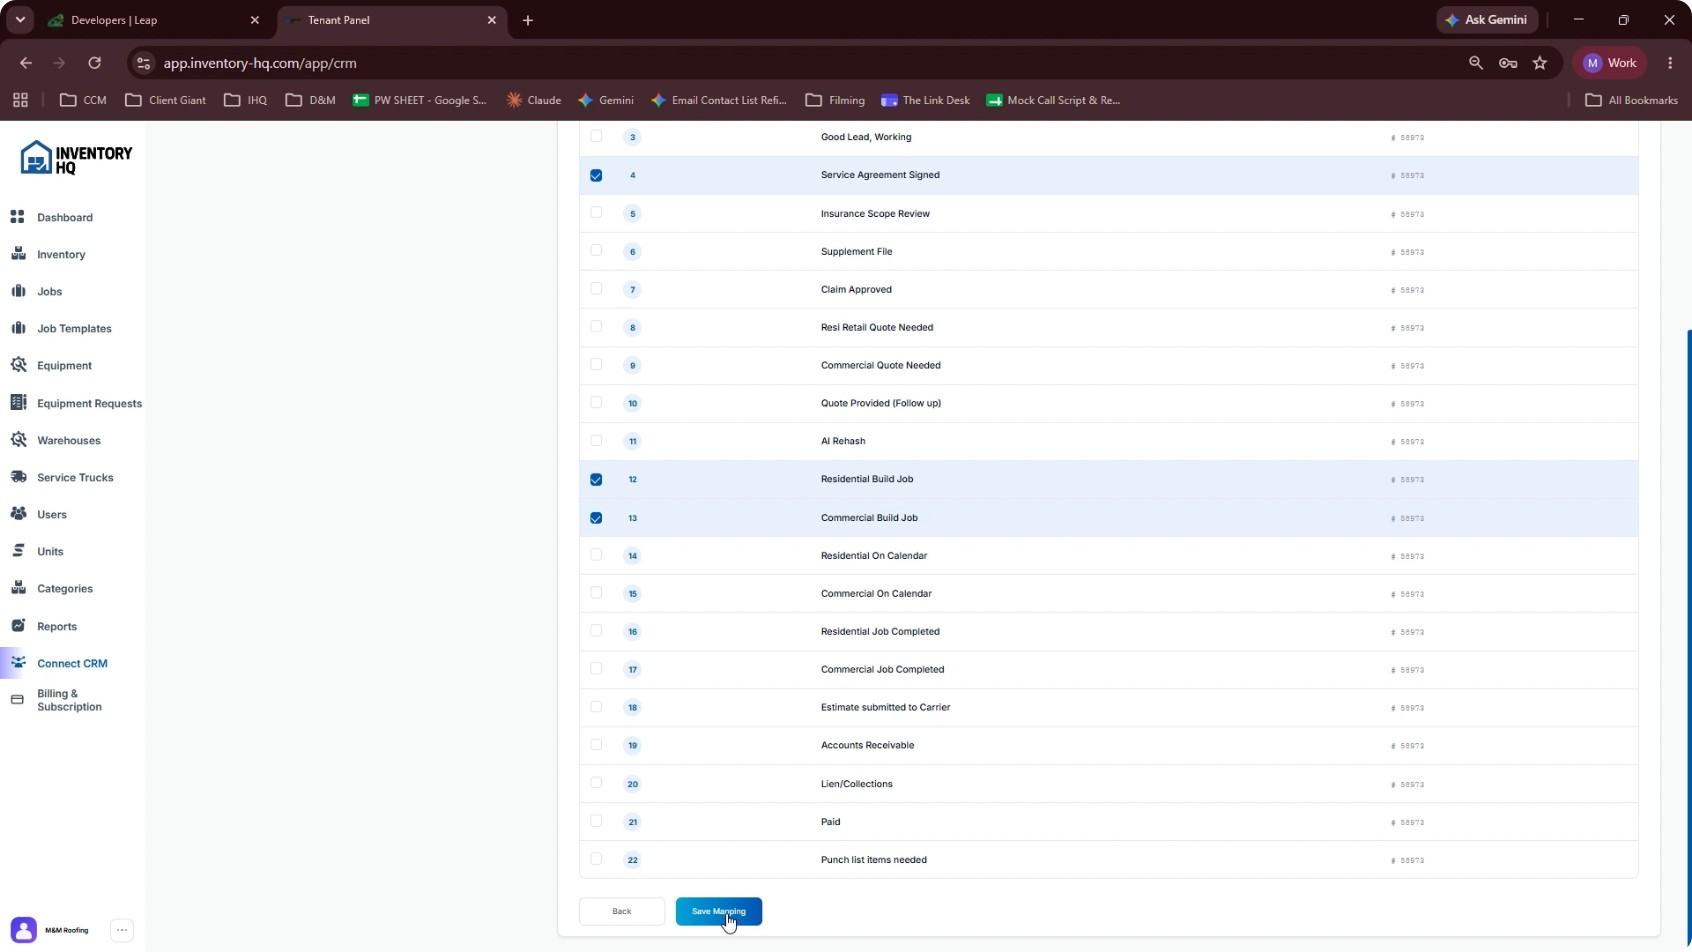
In InventoryHQ, you will now see all your Leap pipeline stages listed. Choose the stage (or stages) that represent a job being awarded or won in your process. For example, you might select:
- Service Agreement Signed, then
- Residential Bill Job or Commercial Bill Job, depending on your workflow.
After choosing the appropriate stages, click to Save the mapping.
- 4
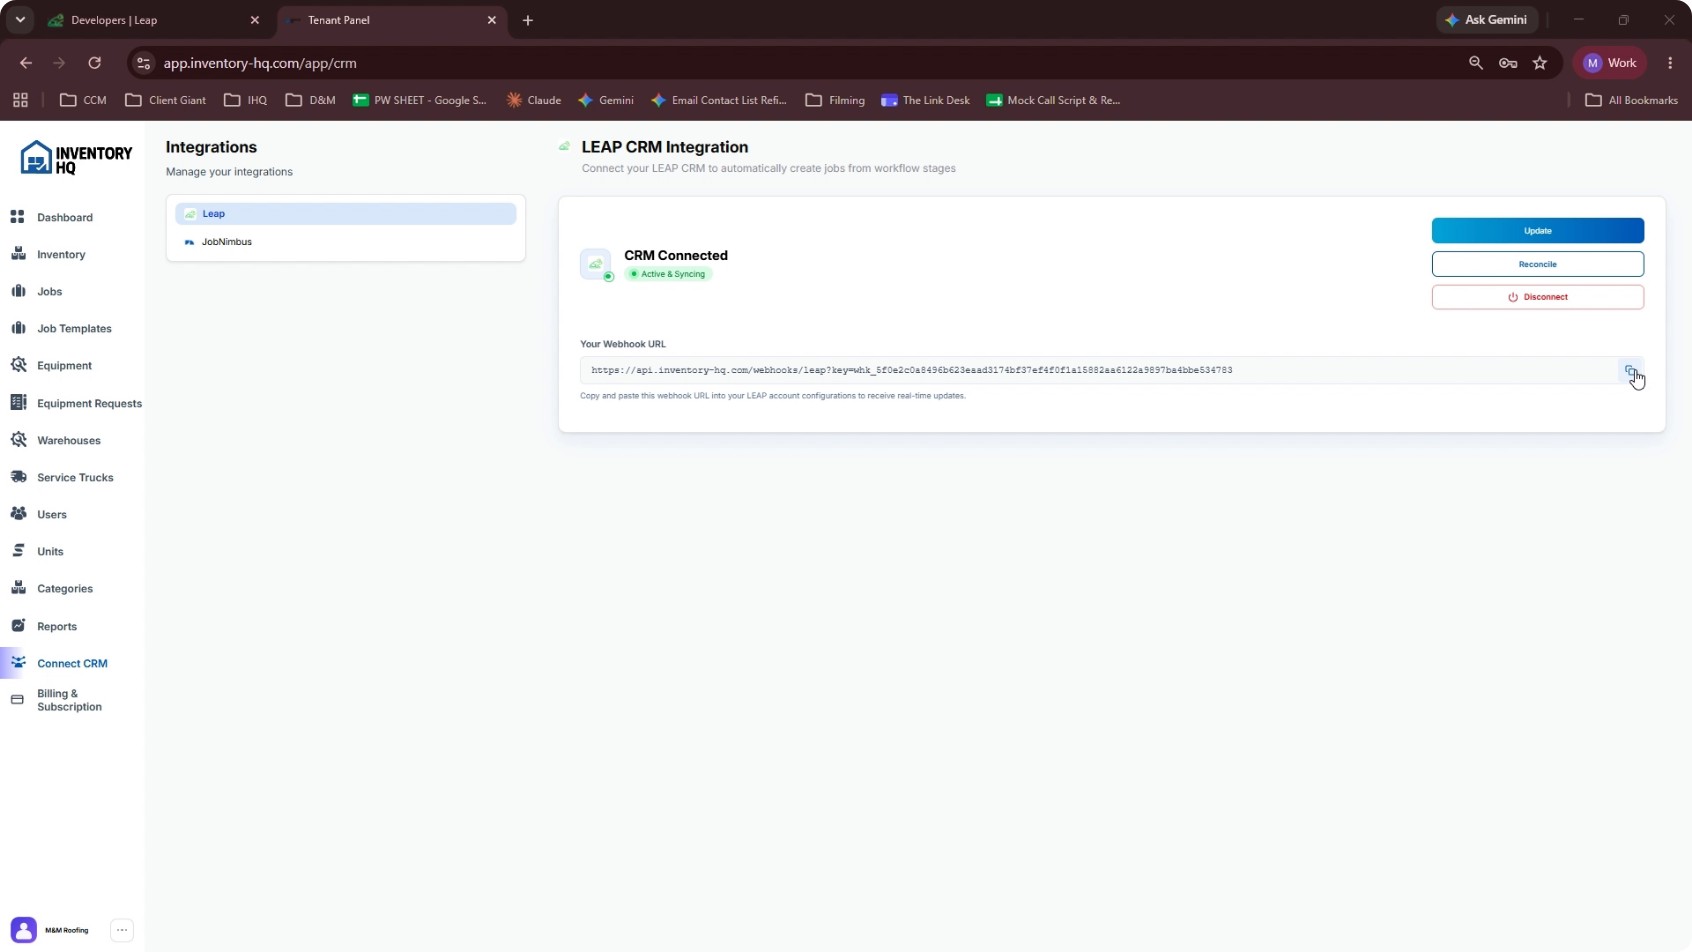
Copy the Webhook URL from InventoryHQ
After saving the workflow mapping, InventoryHQ displays a webhook URL on the same page. Click the Copy button next to this URL to copy it to your clipboard. You will use this URL to configure a webhook in Leap.
- 5
Create a Webhook in Leap
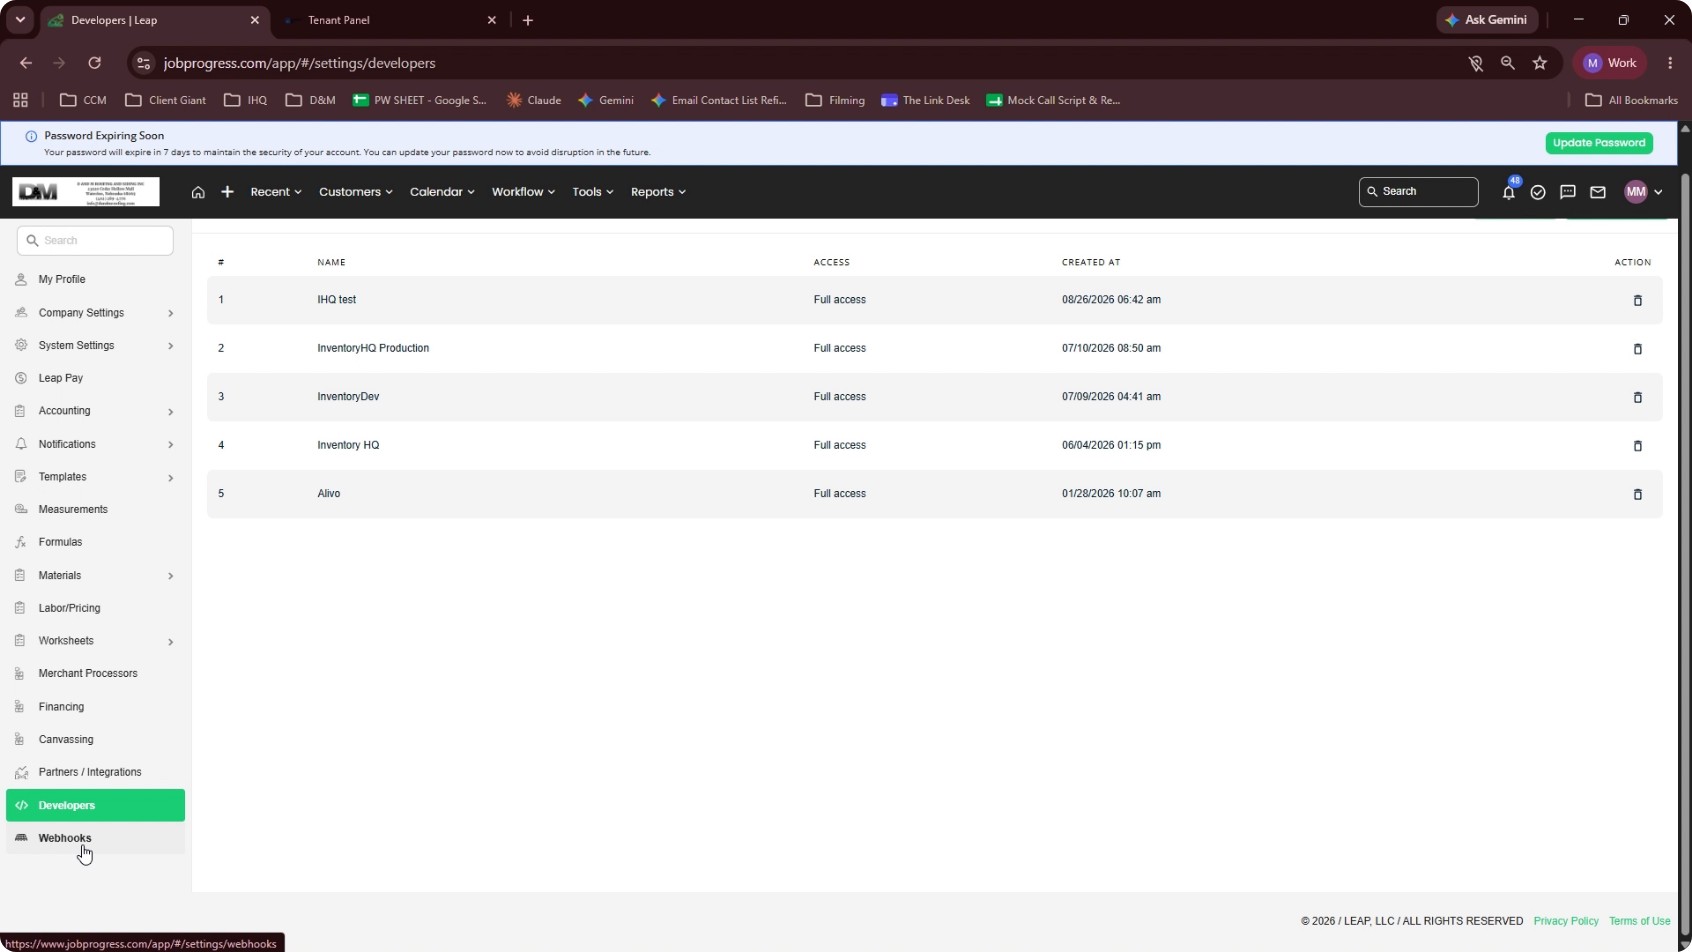
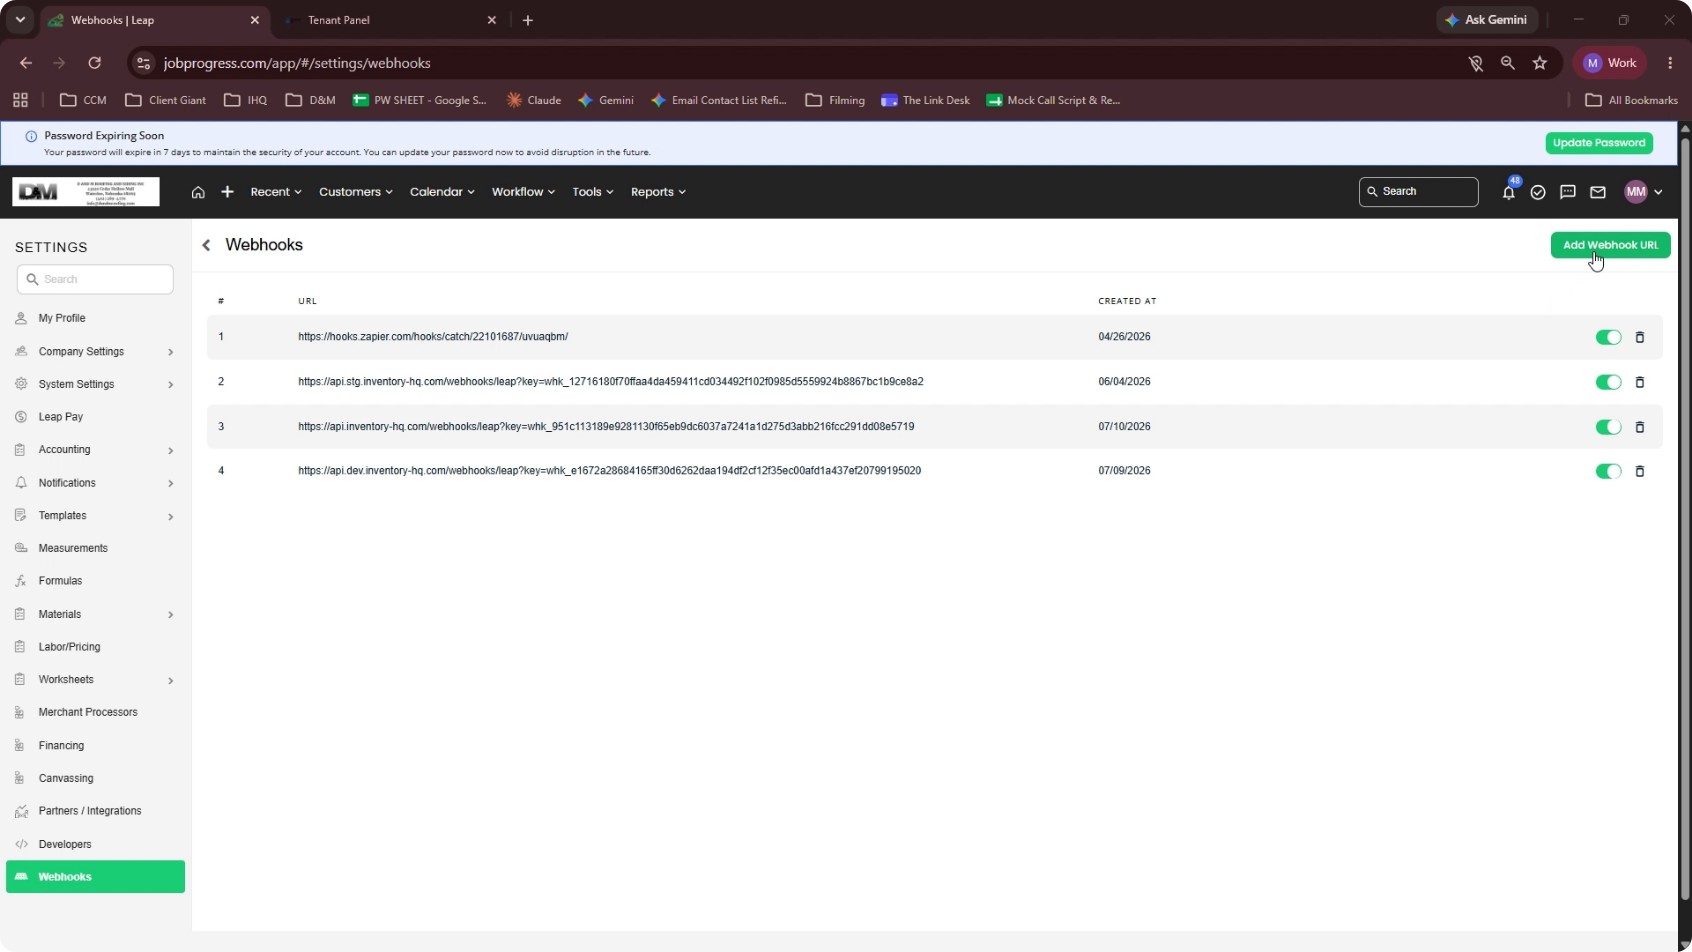
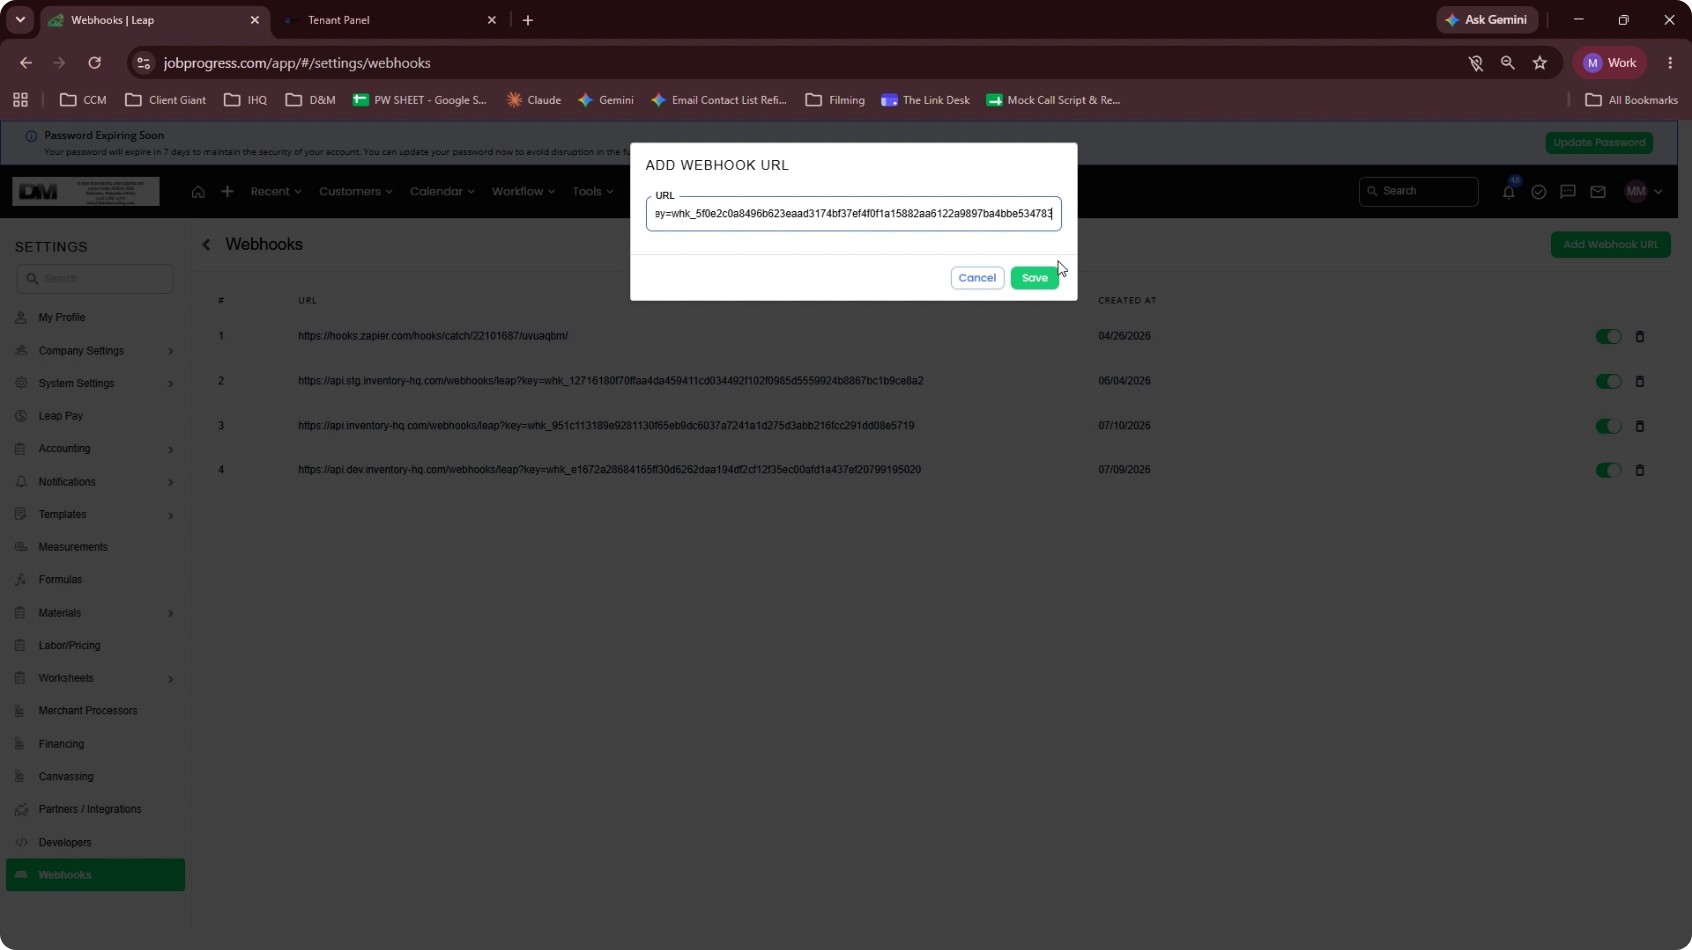
Return to Leap and go back to Settings. In the side panel, open the Webhooks section. Add a new webhook by clicking Add Webhook URL. Paste the webhook URL you copied from InventoryHQ into the URL field, then click Save.
Once saved, Leap will send a notification to this webhook every time a job reaches your designated awarded stage. InventoryHQ will receive these notifications and automatically create the corresponding jobs, completing the integration.
NEXT TUTORIAL
JobNimbus Integration with InventoryHQ →